The Container Store #dressmydesk Challenge
This post is brought to you by The Container Store.
If you’re at all familiar with my office then you know it was all inspired by a little notebook with gold dots, that turned into a wall of gold confetti, which turned into a dresser which turned into a room full of gold, corals and pinks.
I’m so excited to be sharing another office project today that was inspired by these boxes in my office. I love the color of these and I wanted to use that inspiration on my desk. When Amber from Damask Love asked my to #dressmydesk using some of my favorite items from The Container Store I was all in. Did you know that The Container Store just opened up about 20 minutes away from me? Did you know I just made my first trip THIS week? Did you know that i’m completely in love and now I just want to reorganize my entire HOME! I do. I really do. Oh the day dreaming I’ve been doing.
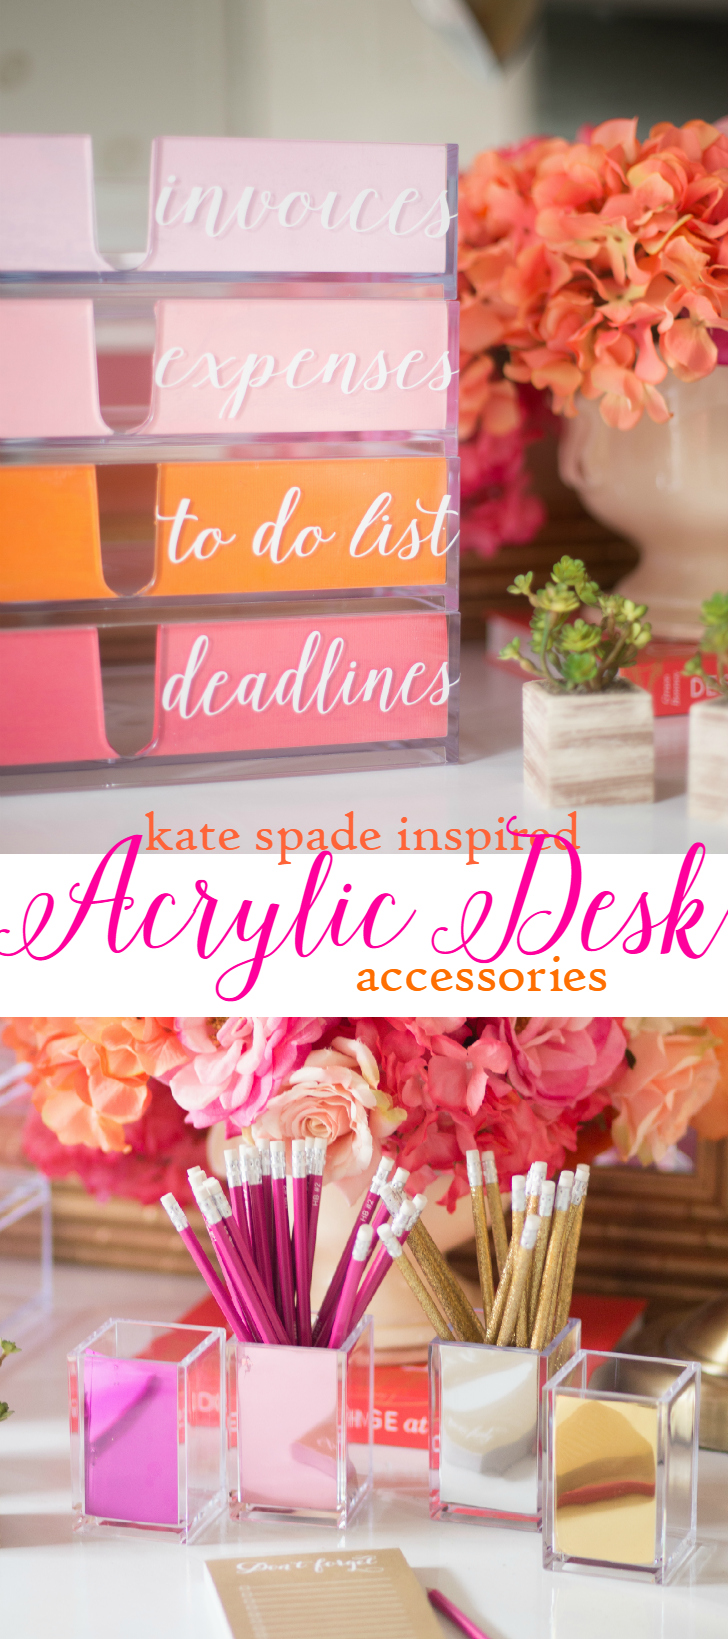
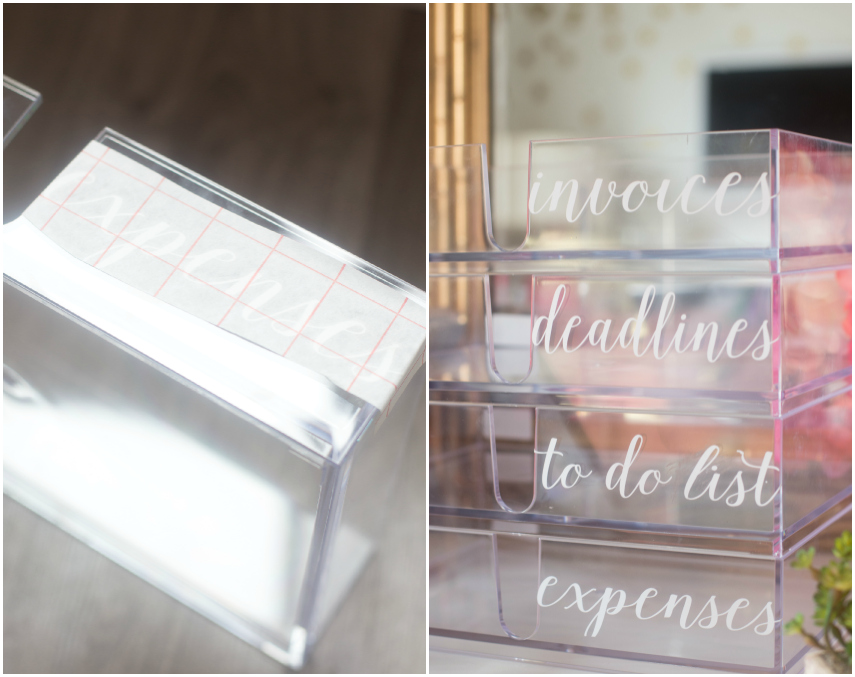
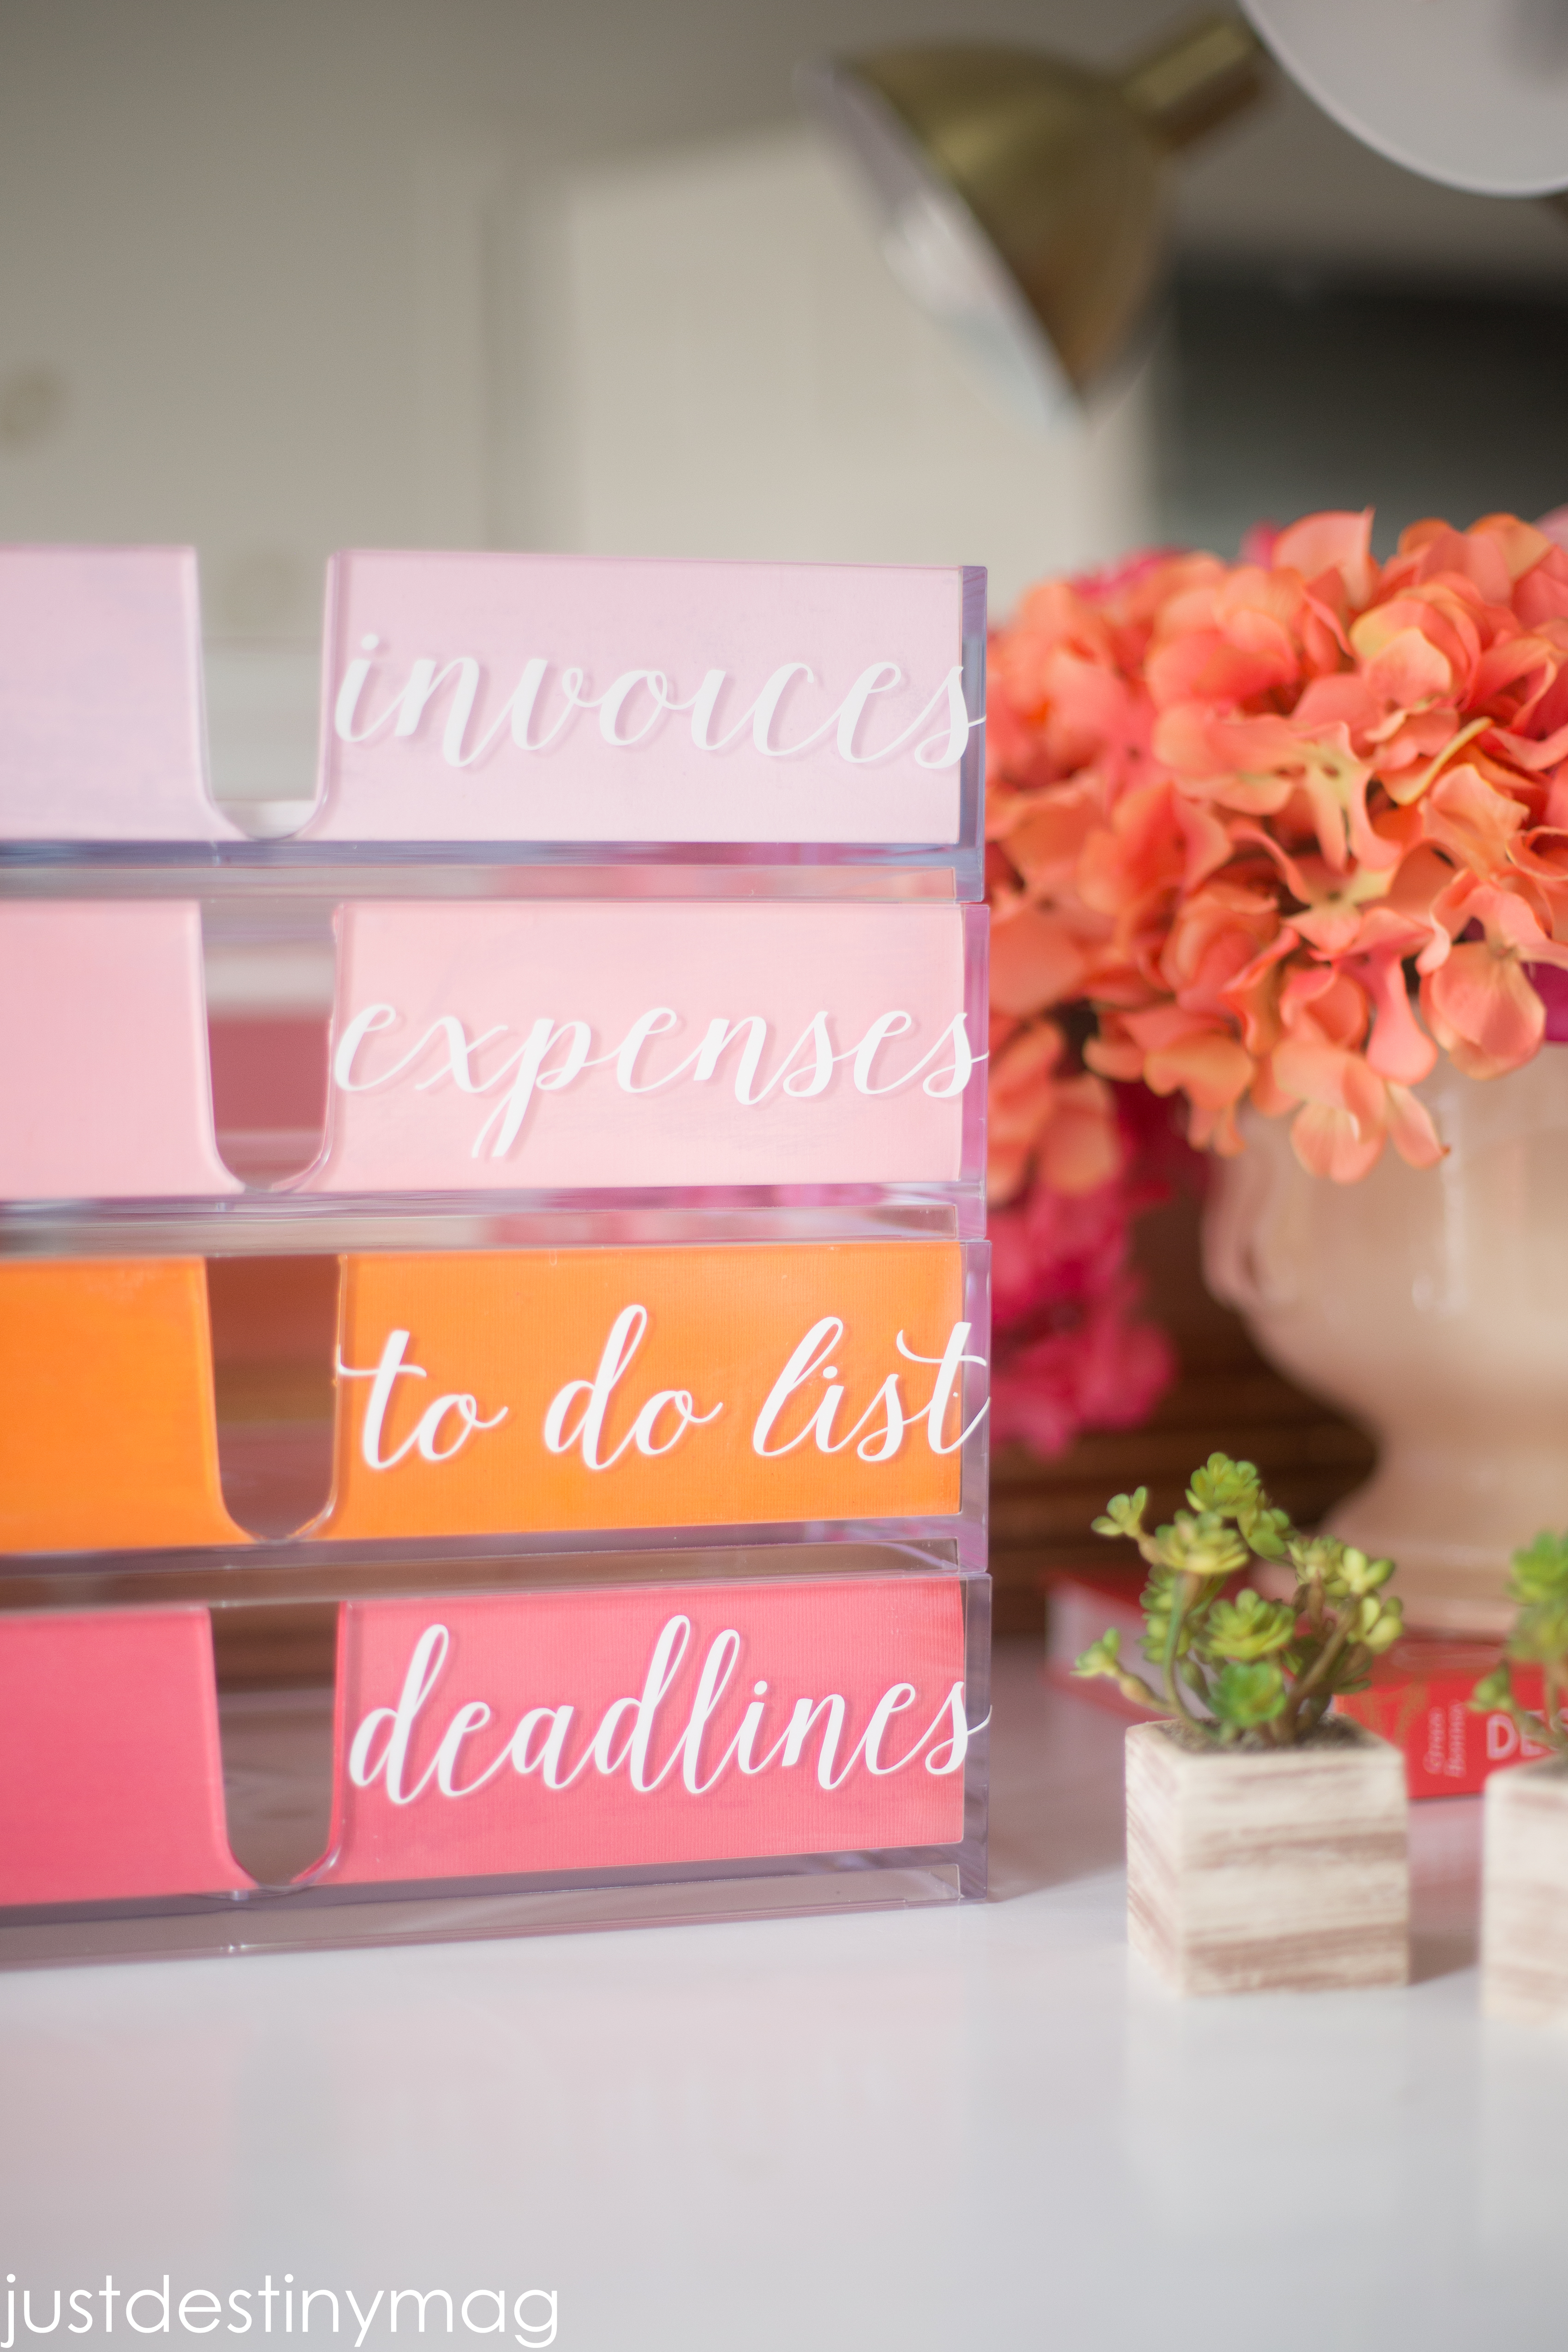
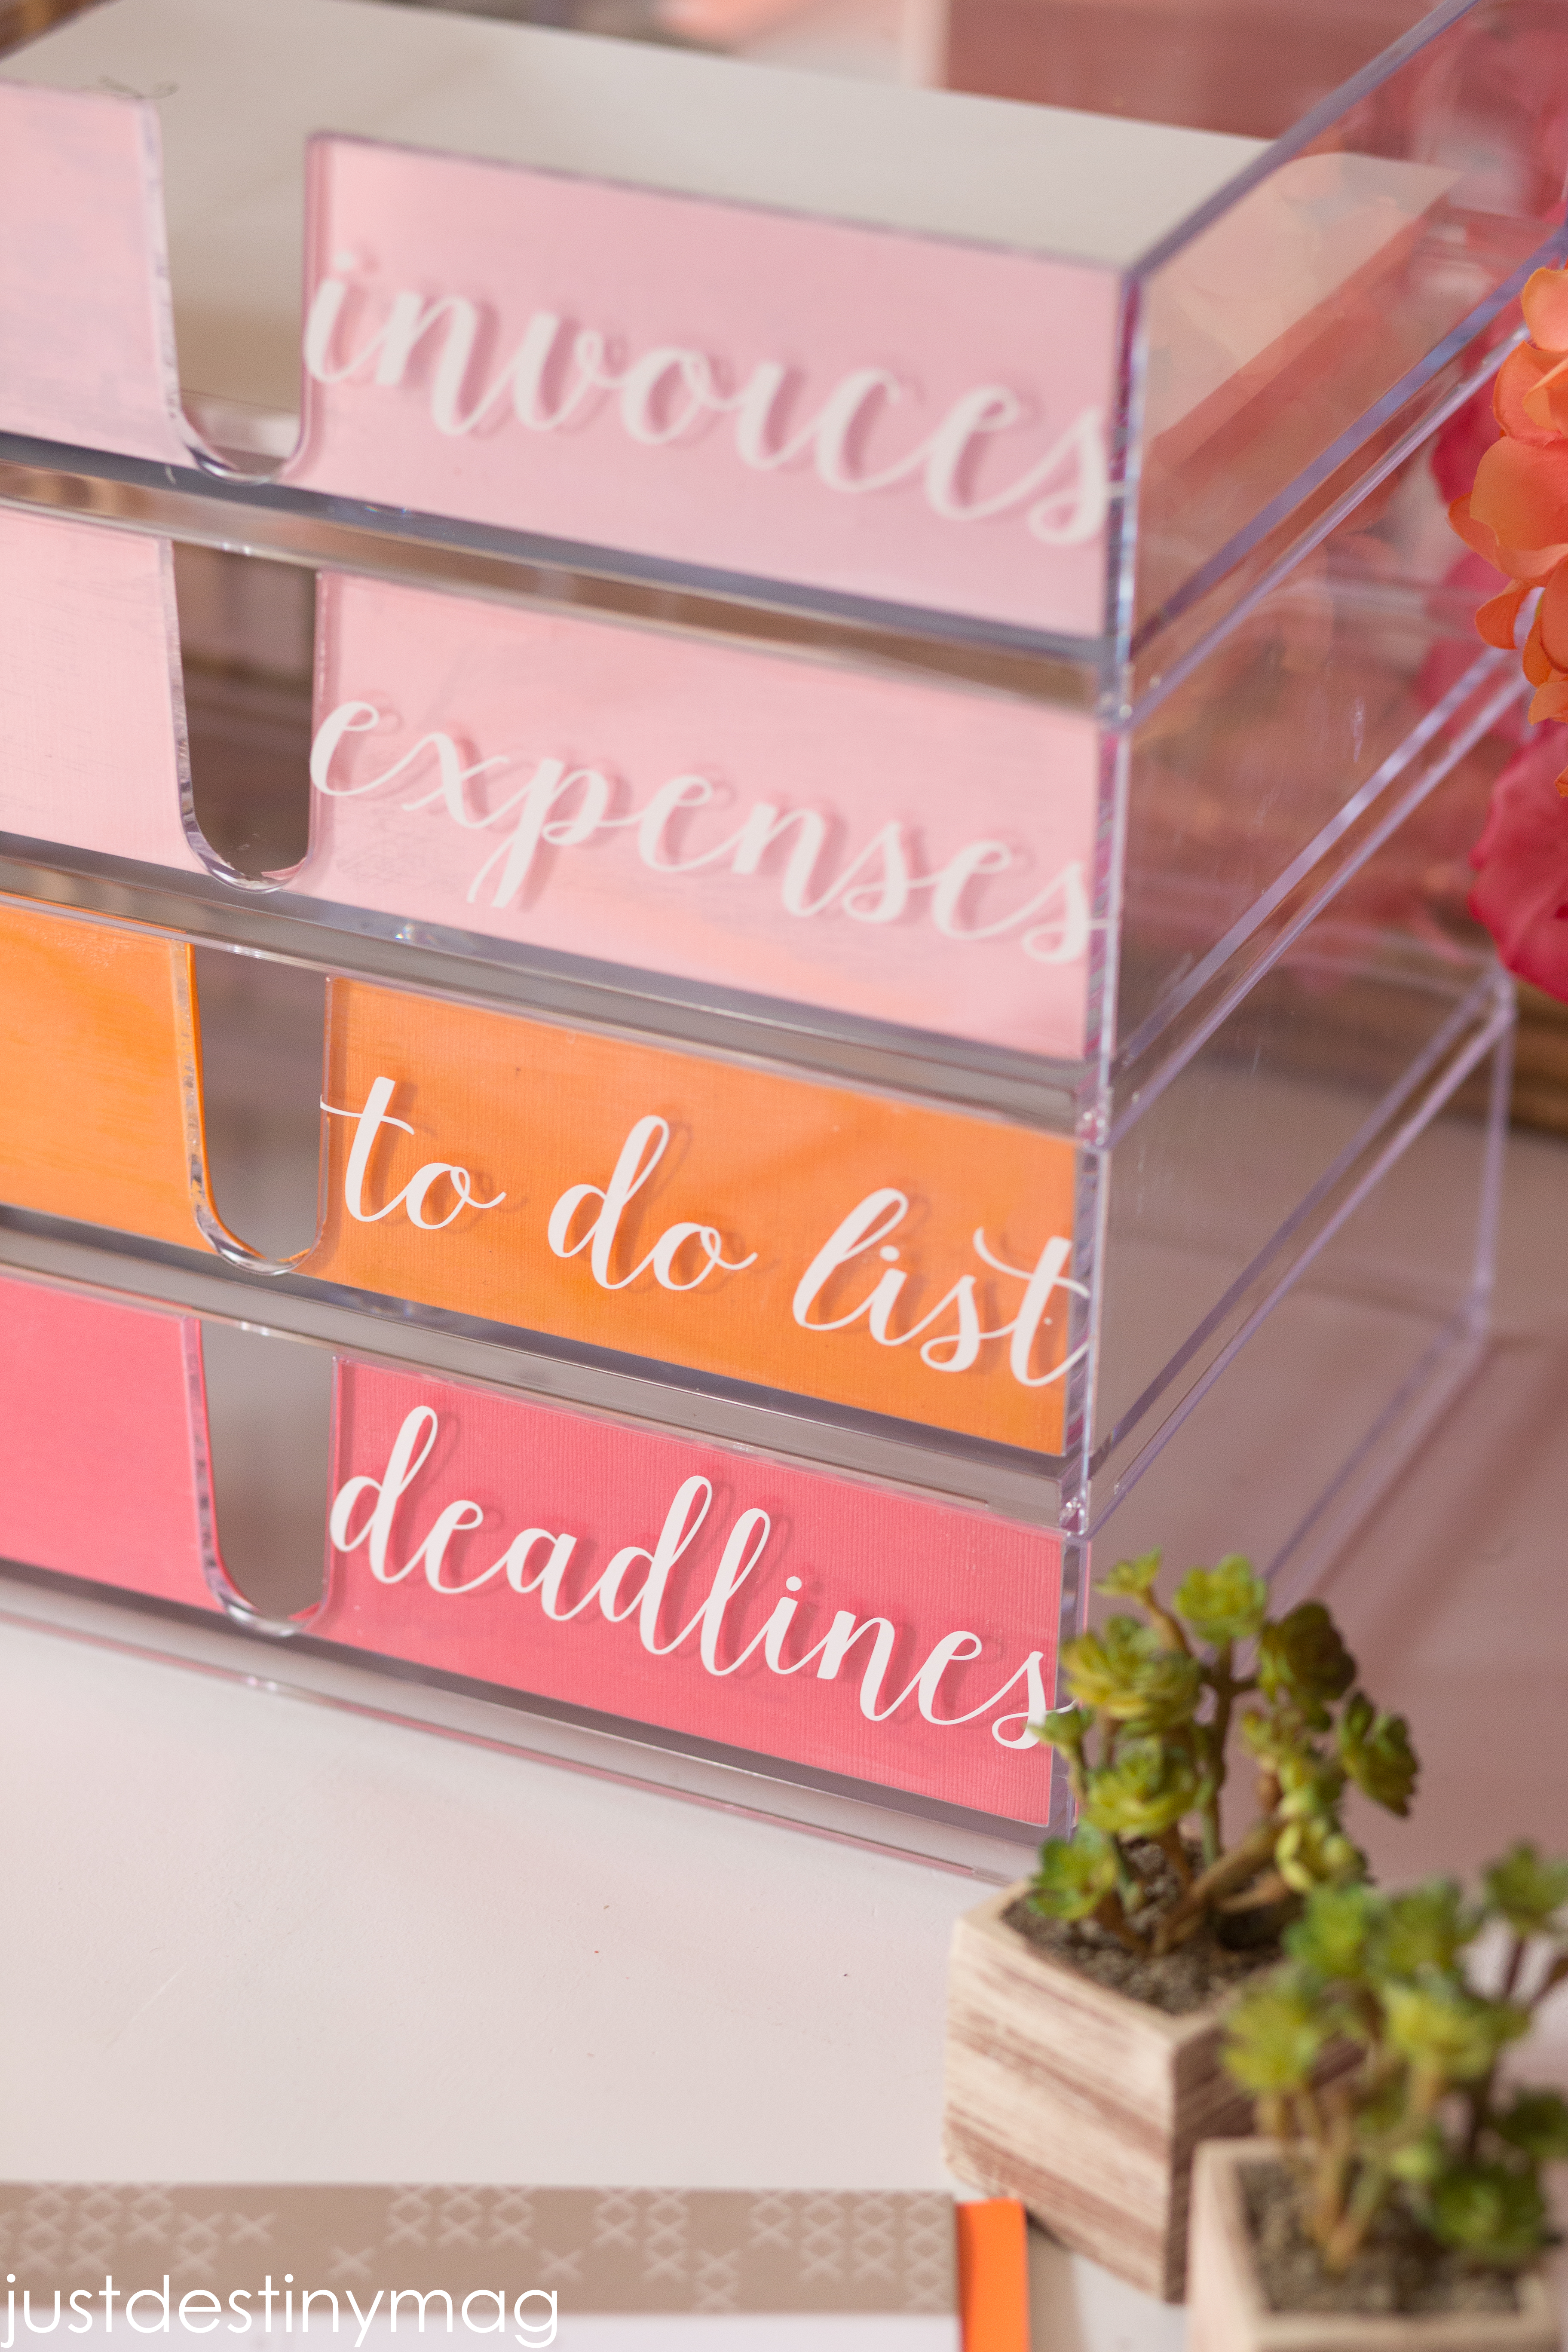
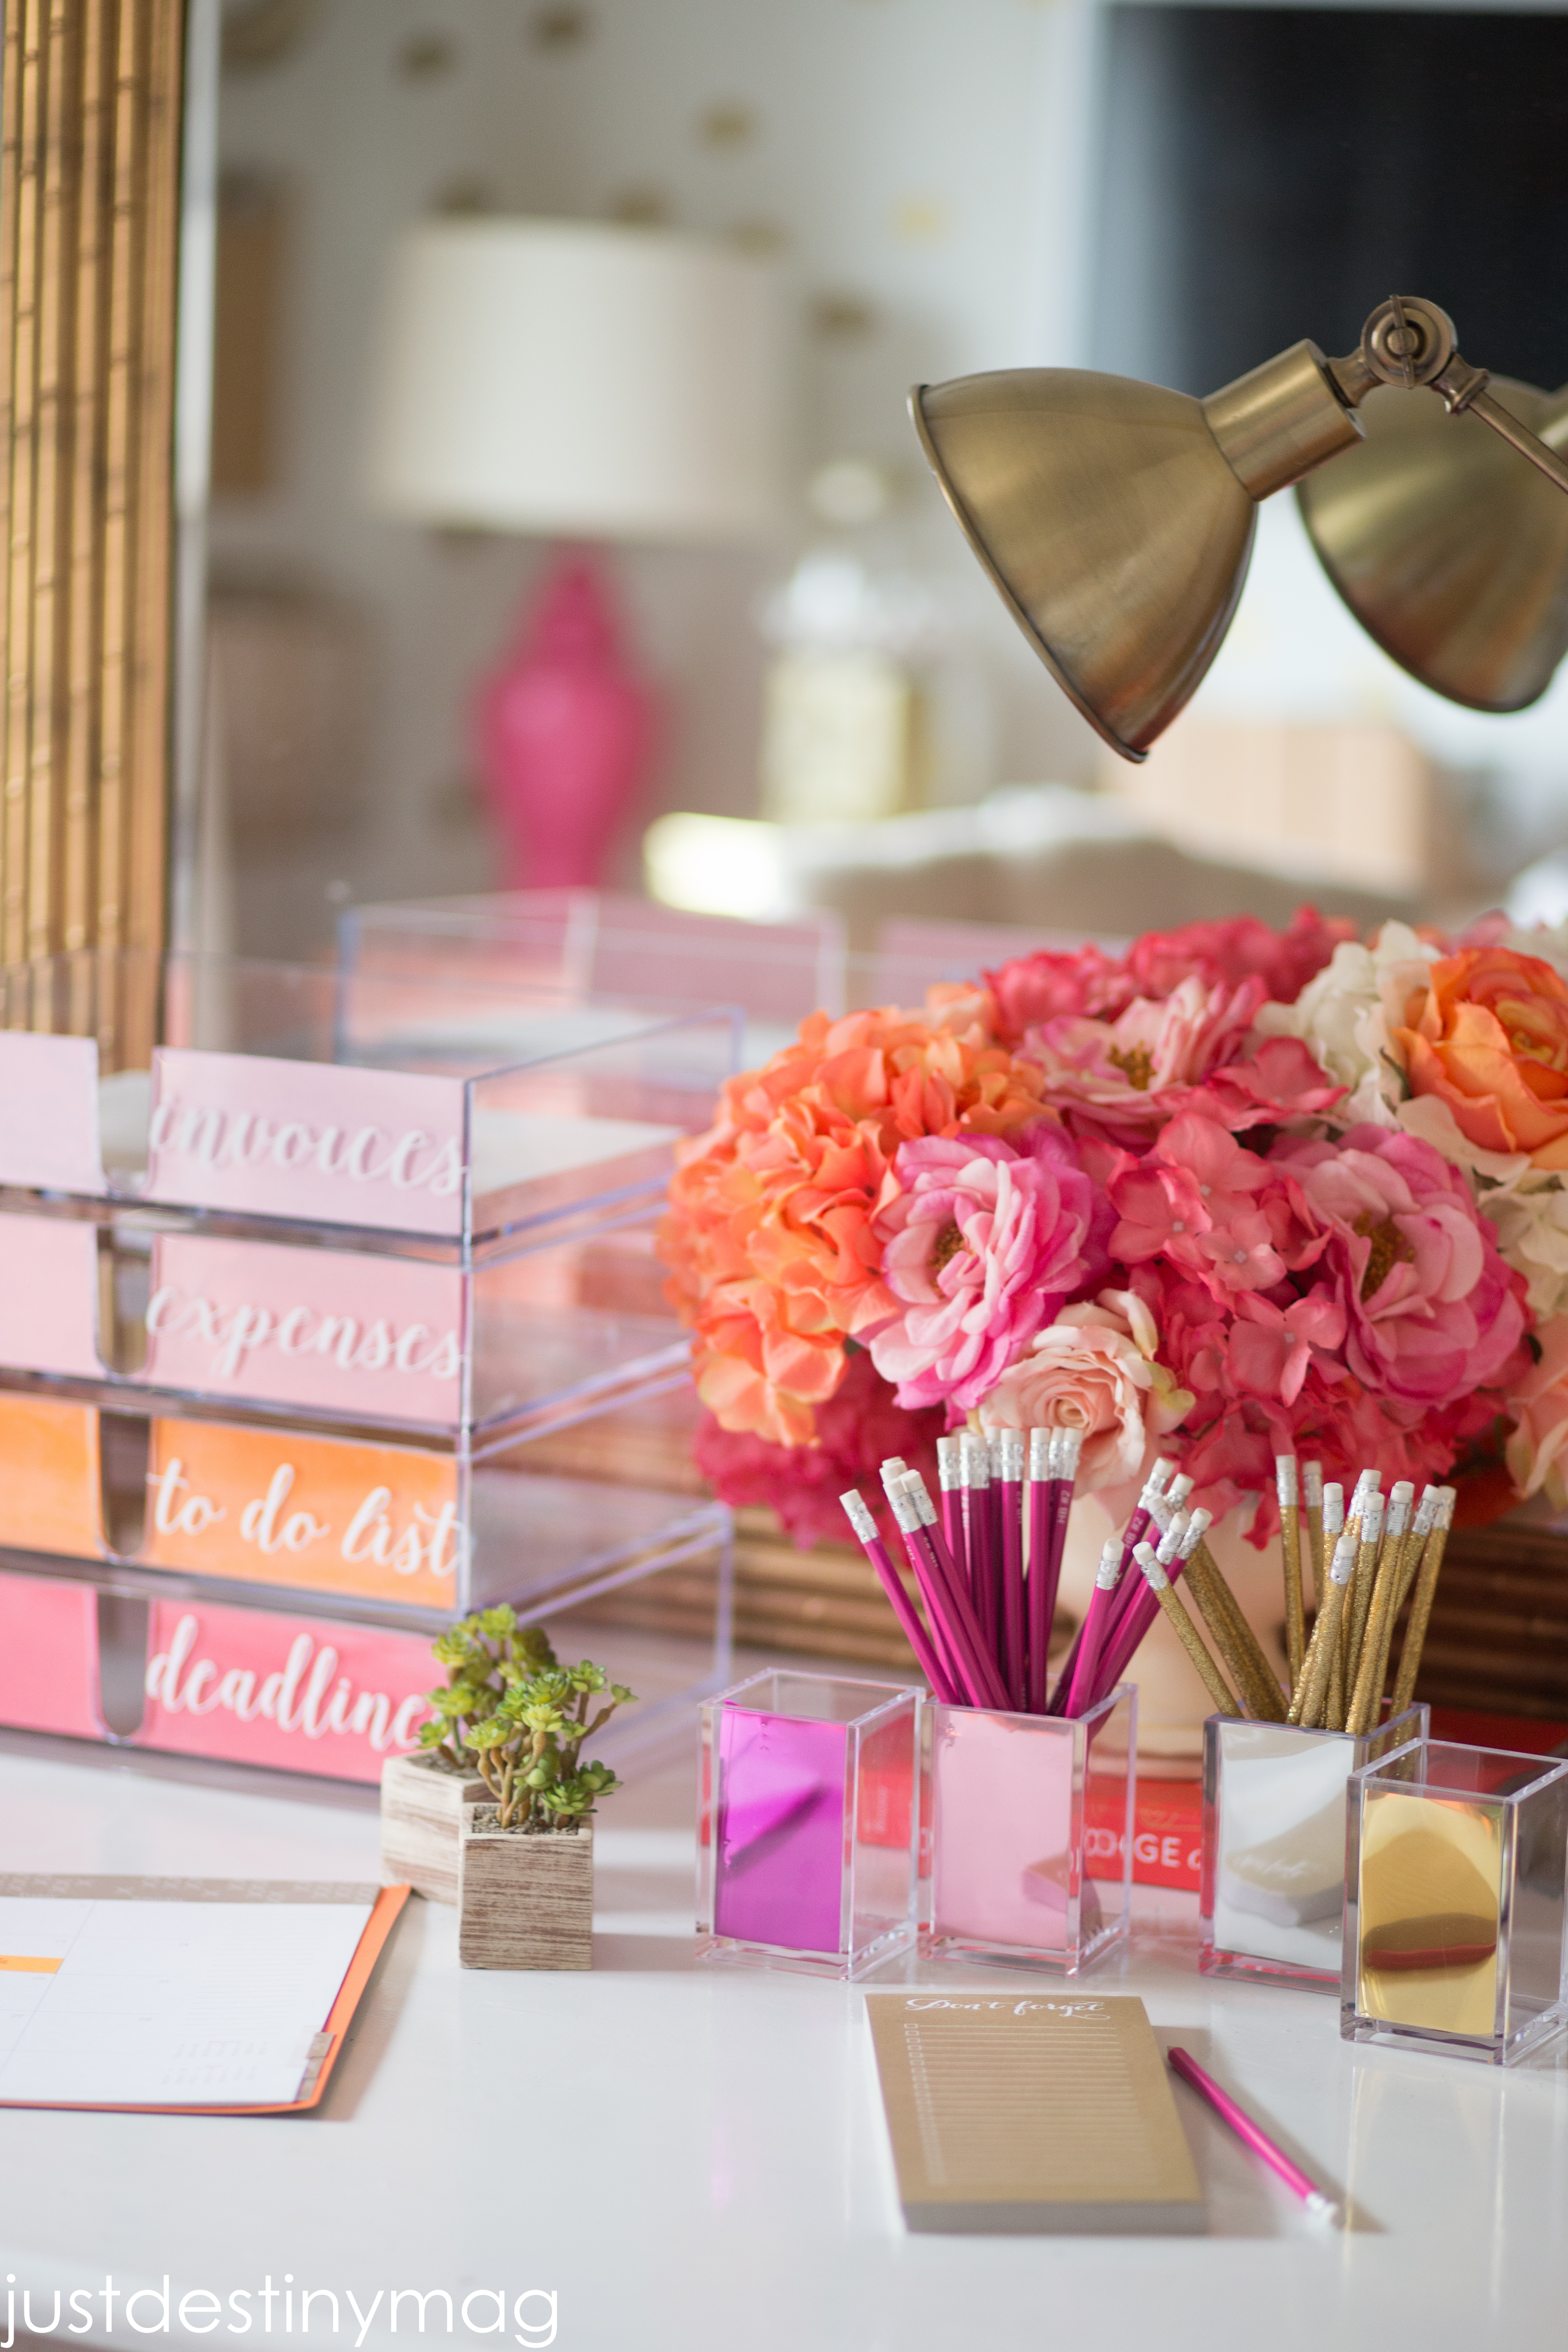
Having and orderly desk is definitely a priority when I want to get things done. So I took these stackable letter holders and made myself an open filing system. Now the thing about these boxes is that you can’t reach in for your papers unless it happens to be at the top. This actually works for me because I wanted to have all my desk papers which include things to do, expenses, invoices and deadlines insight. To make these delicious Pink Stacked Letter Holders you will need the following:
♥ Letter Holders from The Container Store
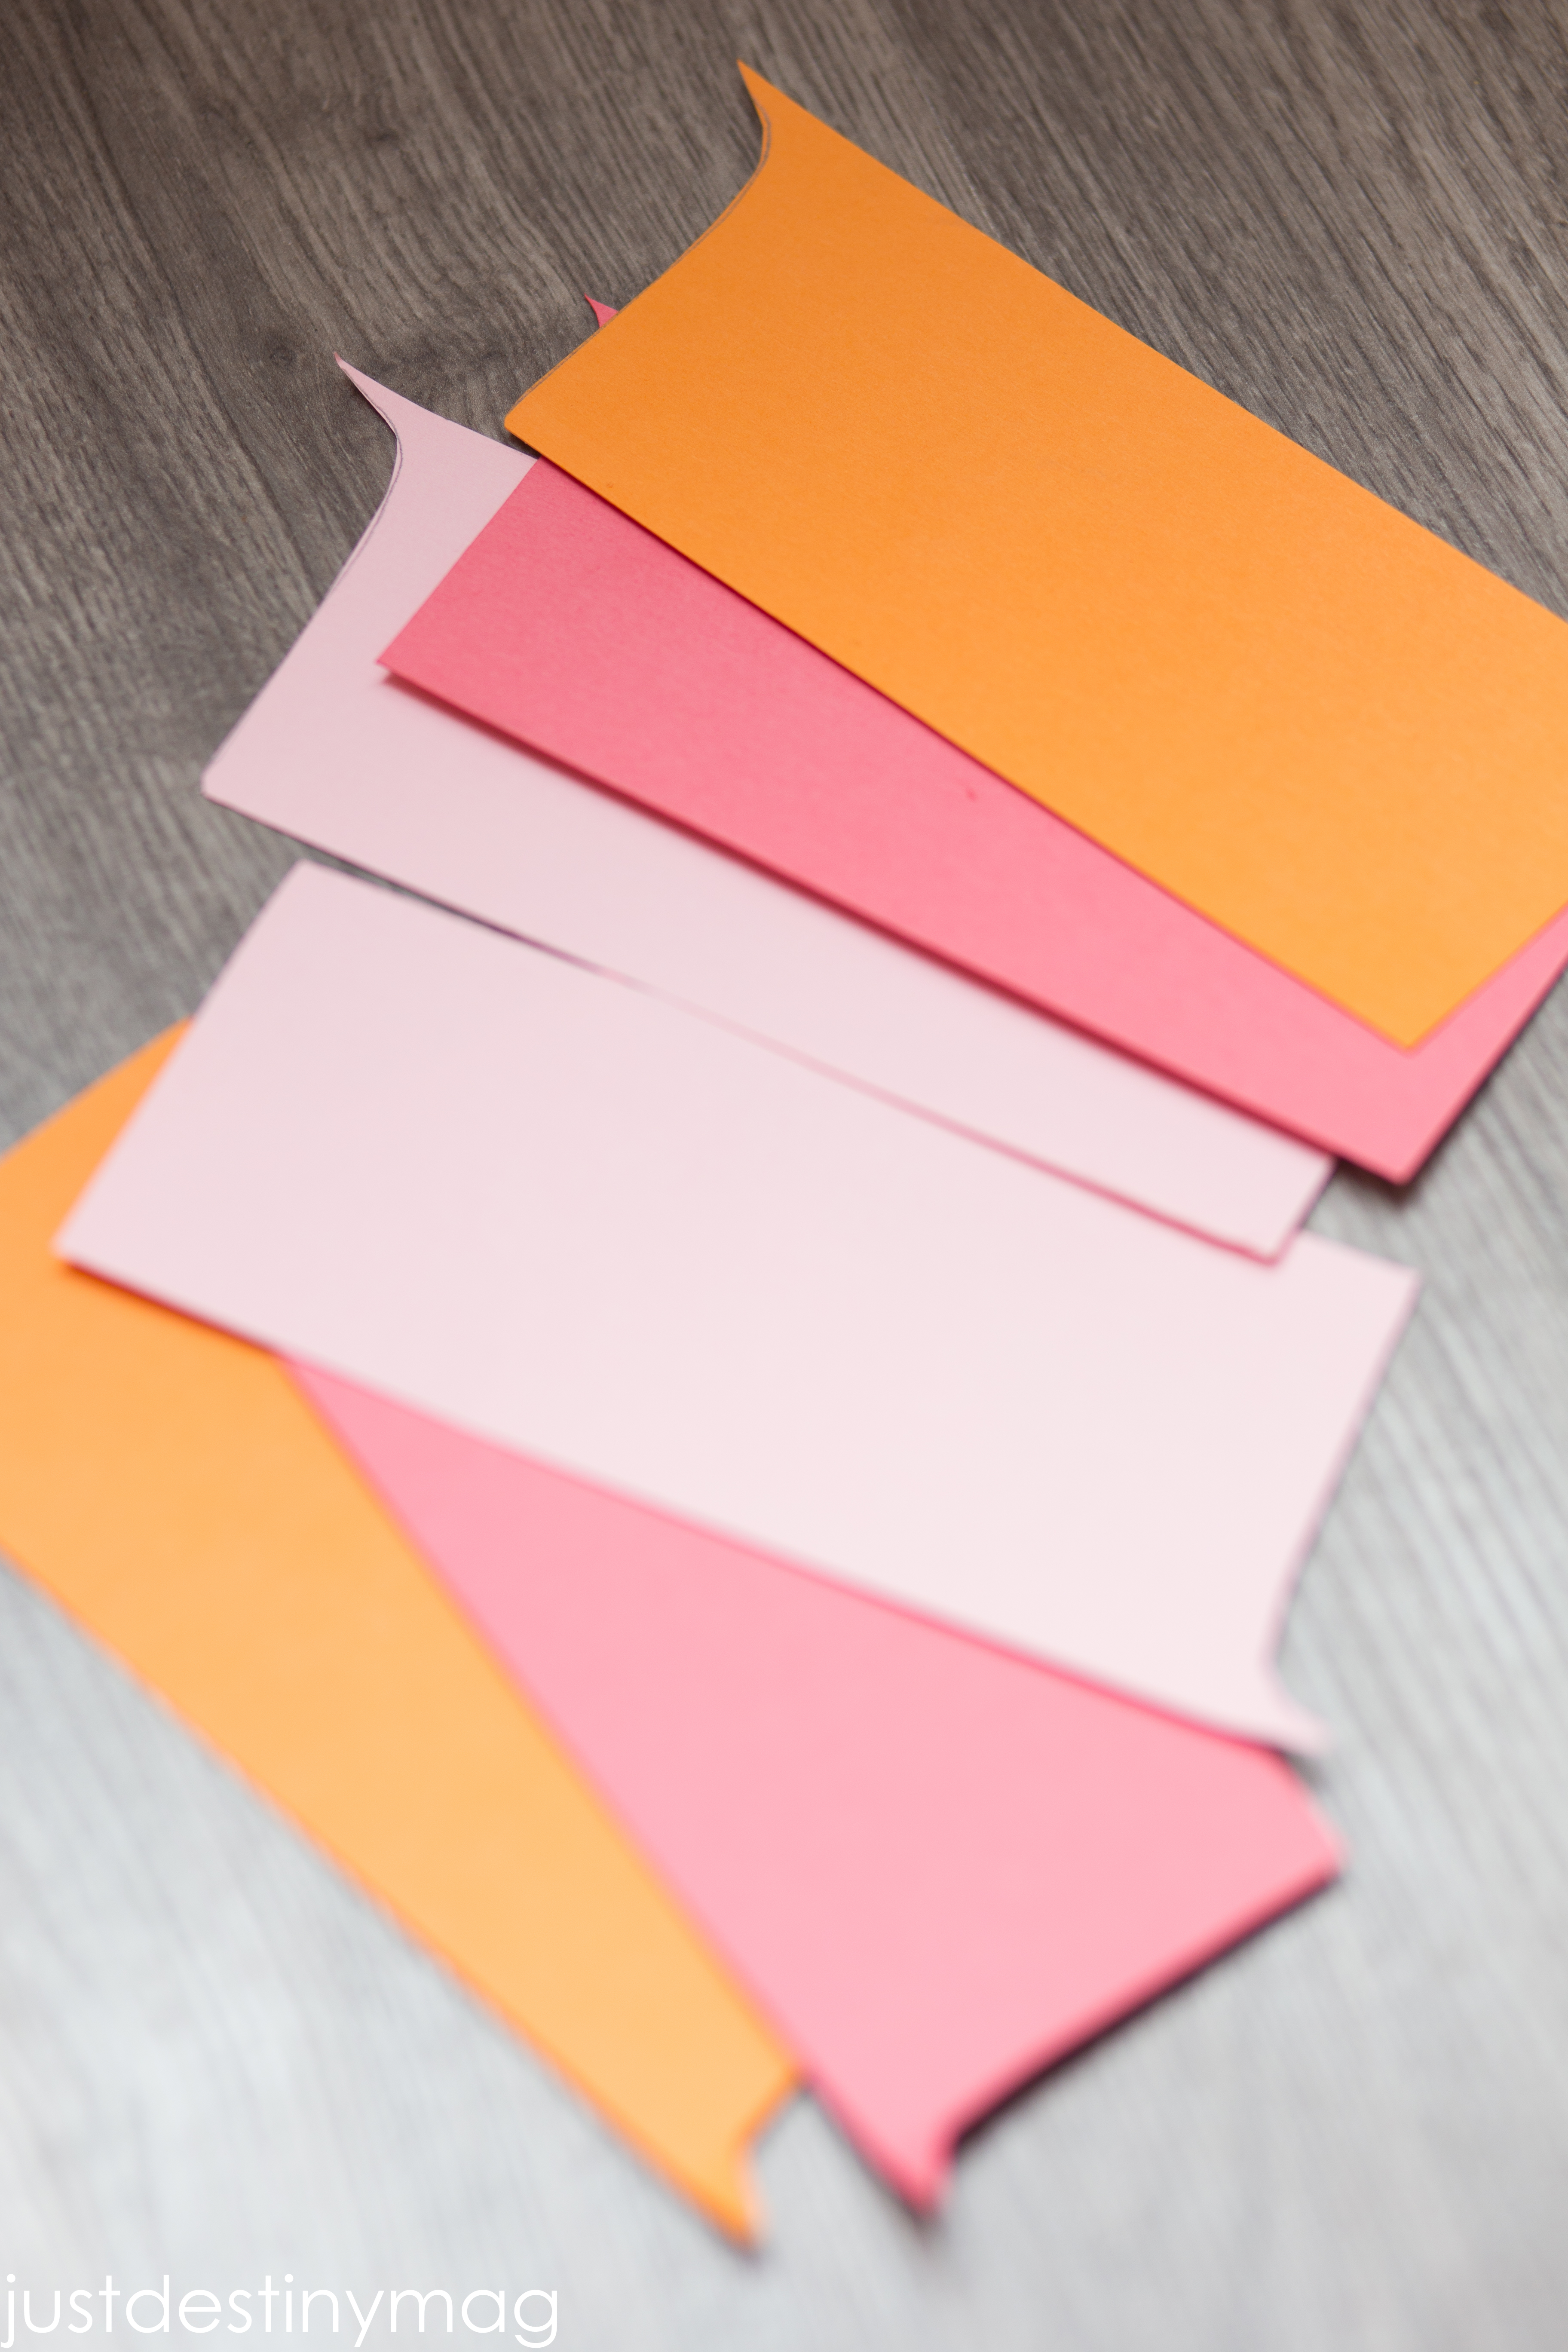
♥Pink Cardstock in different hues
♥White vinyl labels from cutting machine
♥Modge Podge
♥Sponge Brush
♥Scissors
♥Pencil
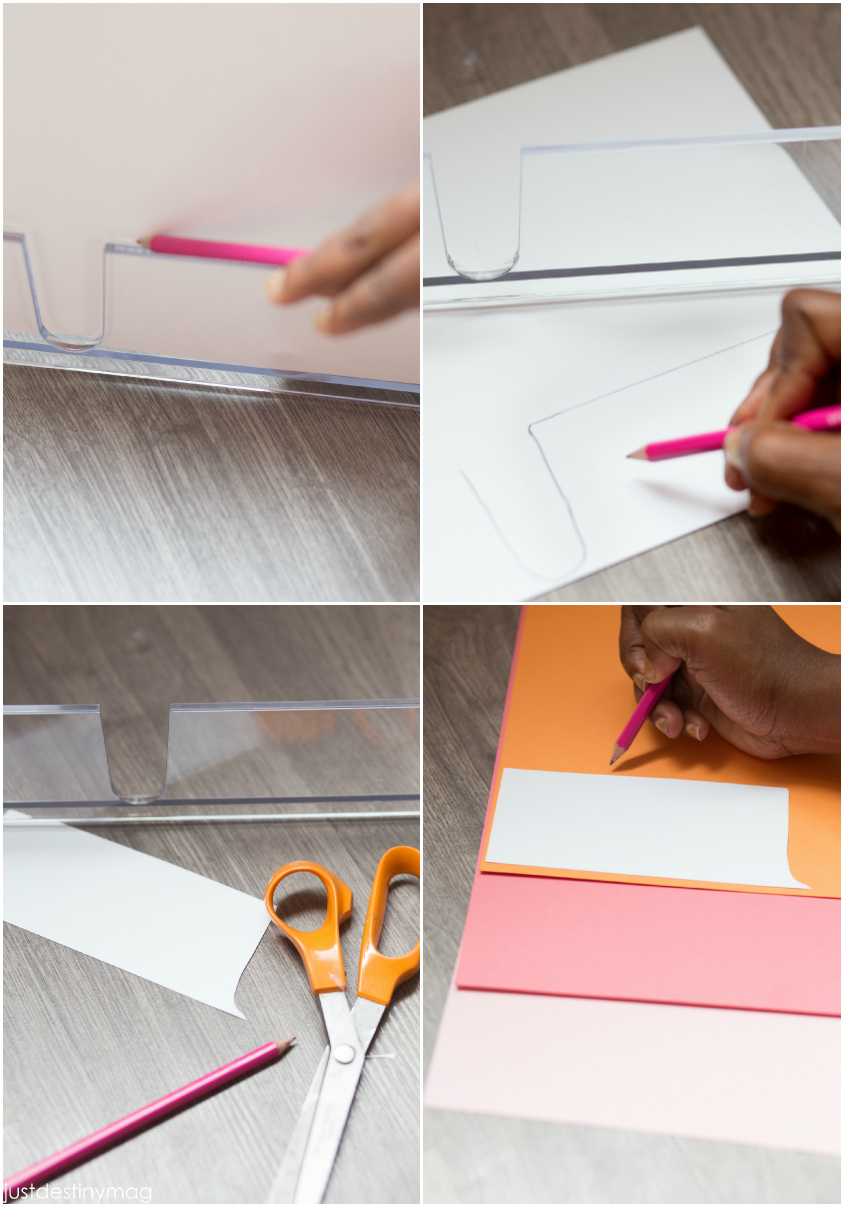
[line]First use a piece of cardstock and pencil to trace a template around the front of the letter holder. Then cut the cardstock template out using scissors. After that use the template to cut out the right and left sides of the letter head inserts.[line]
 [line]Next prepare some vinyl labels on your cutting machine to fit the front of one side of the letter holder about 2×6 inches long. Update: I cut these labels using my SILHOUETTE PORTRAIT which I highly recommend! The font I used is called Isabella [line]
 [line]Before you glue the inserts down make sure you check for any extra trimming. Once you have a perfect fit, use the sponge brush to paint a thin layer of modge podge onto the paper. Gently press it onto the inside of the letter holders.[line]
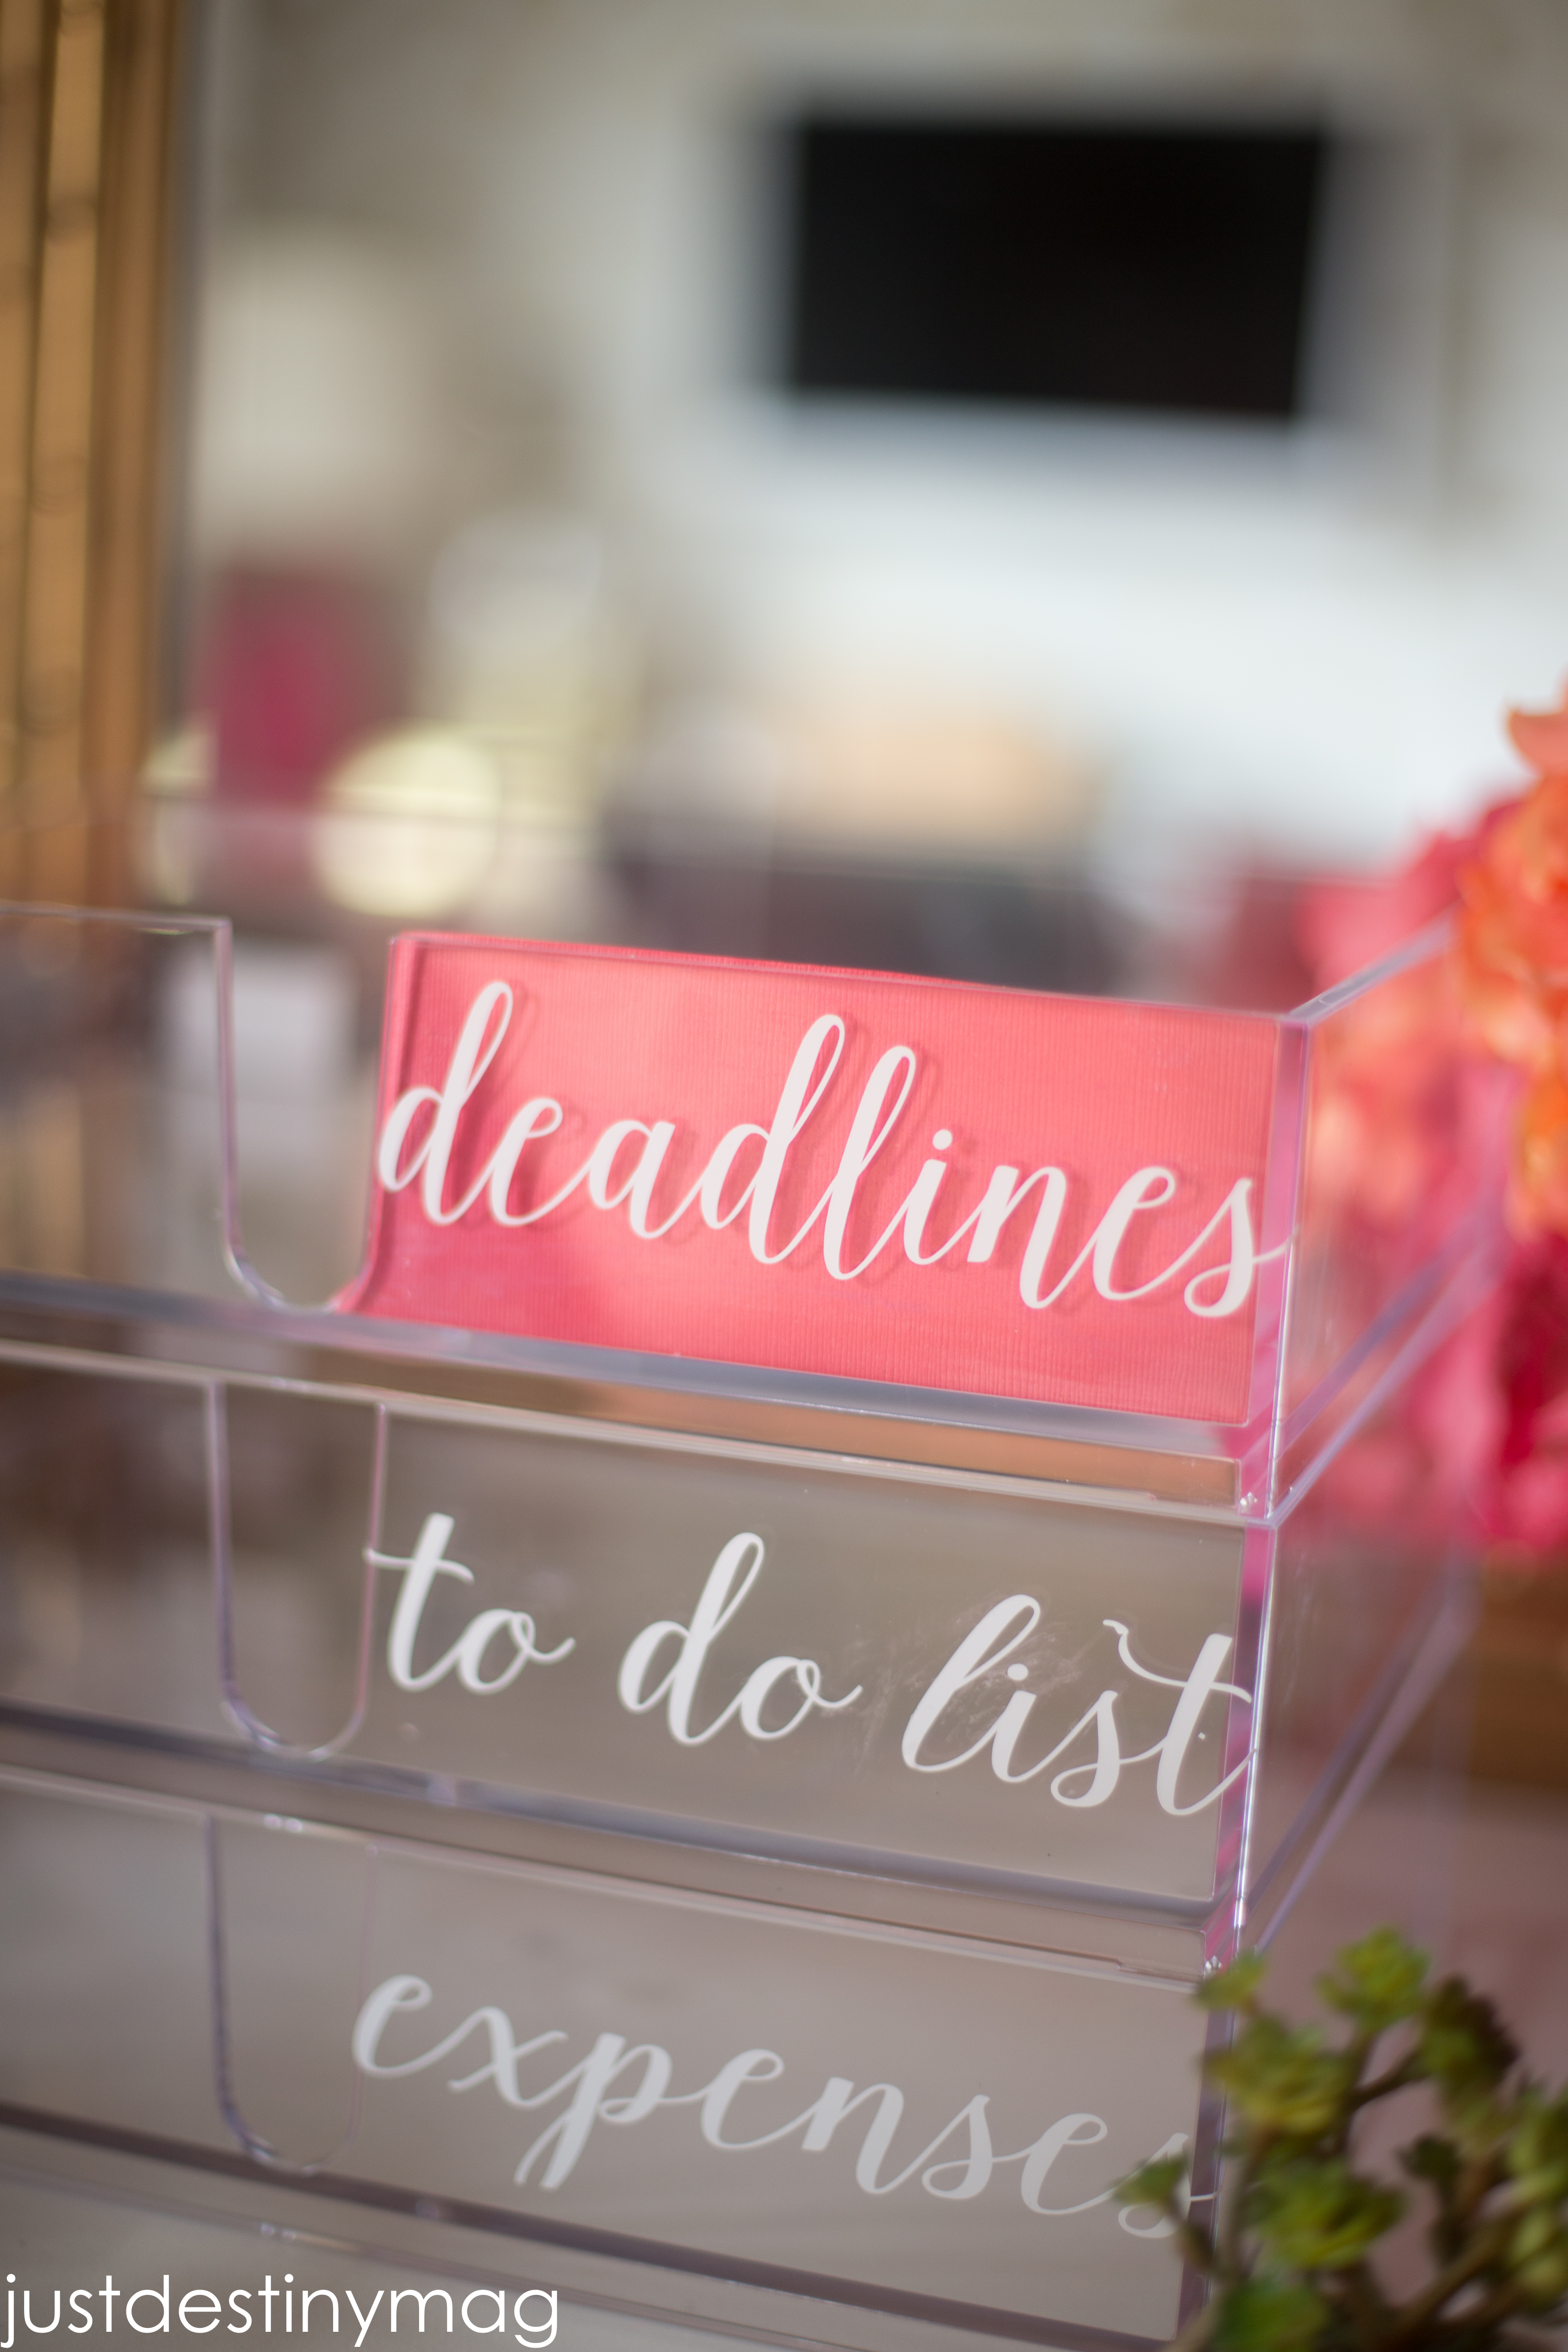

 I love all of the color it gives my desk!
 [line][line][warning]WARNING: SUPER EASY PROJECT AHEAD!!!![/warning]
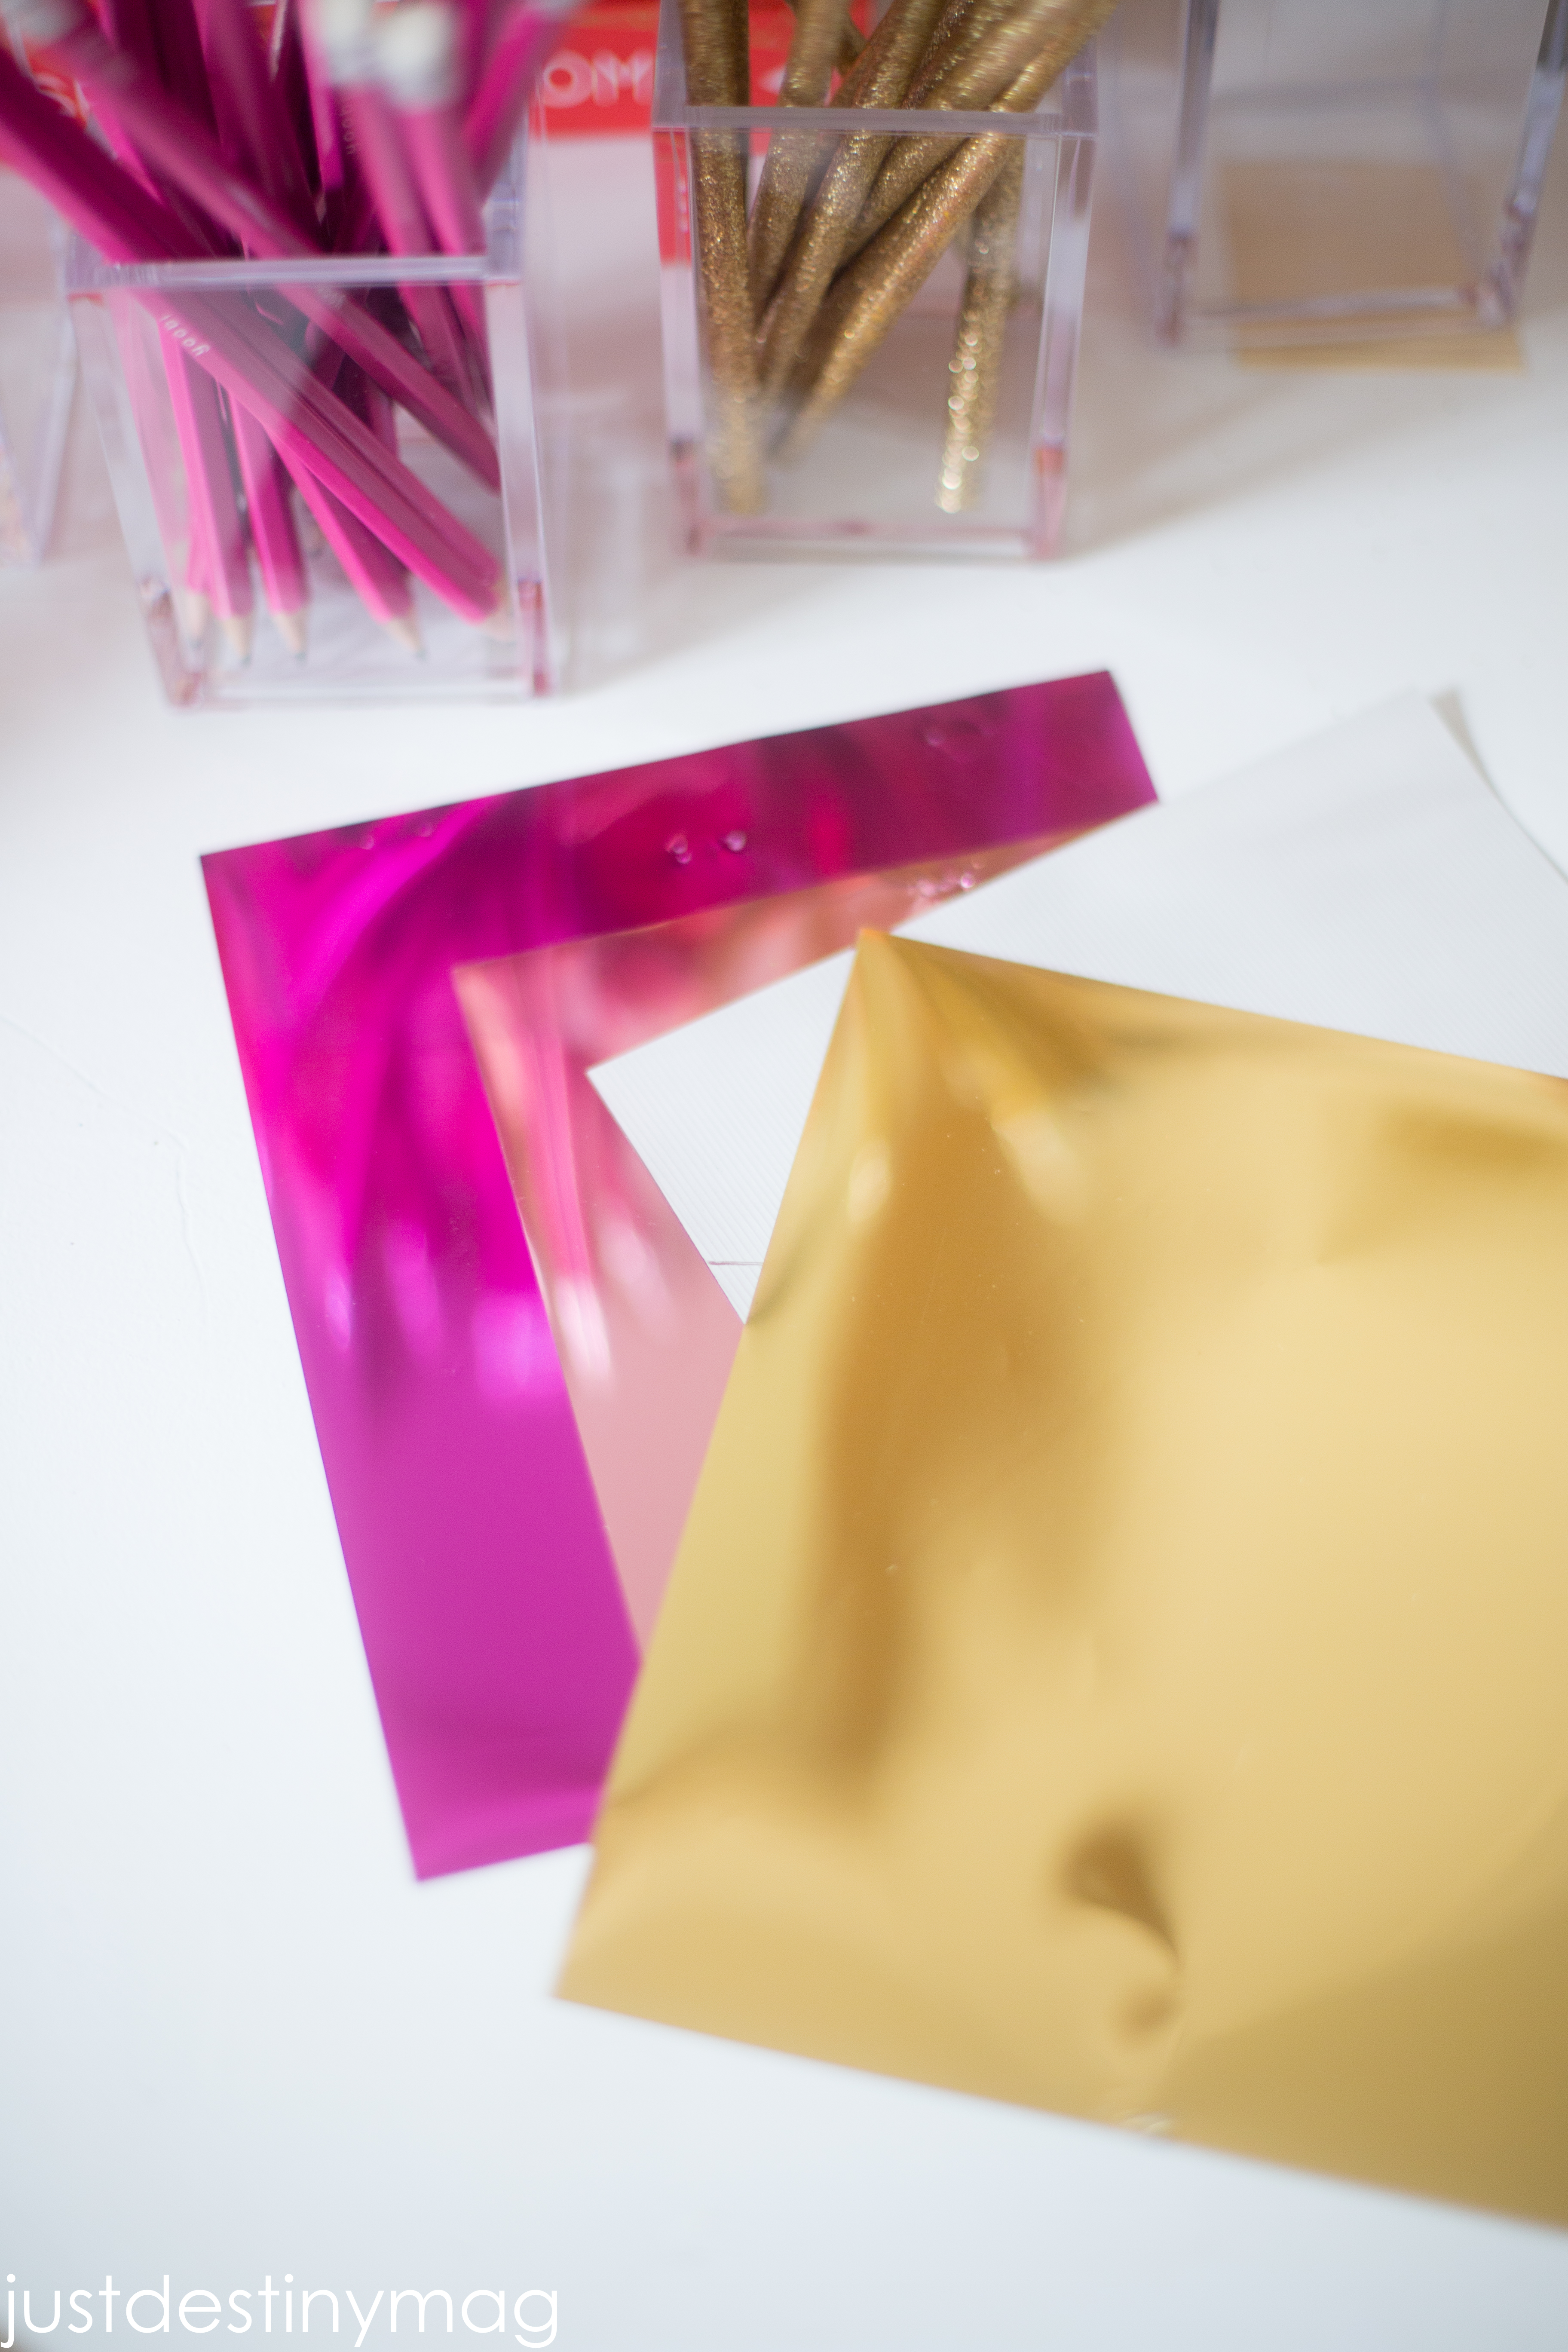
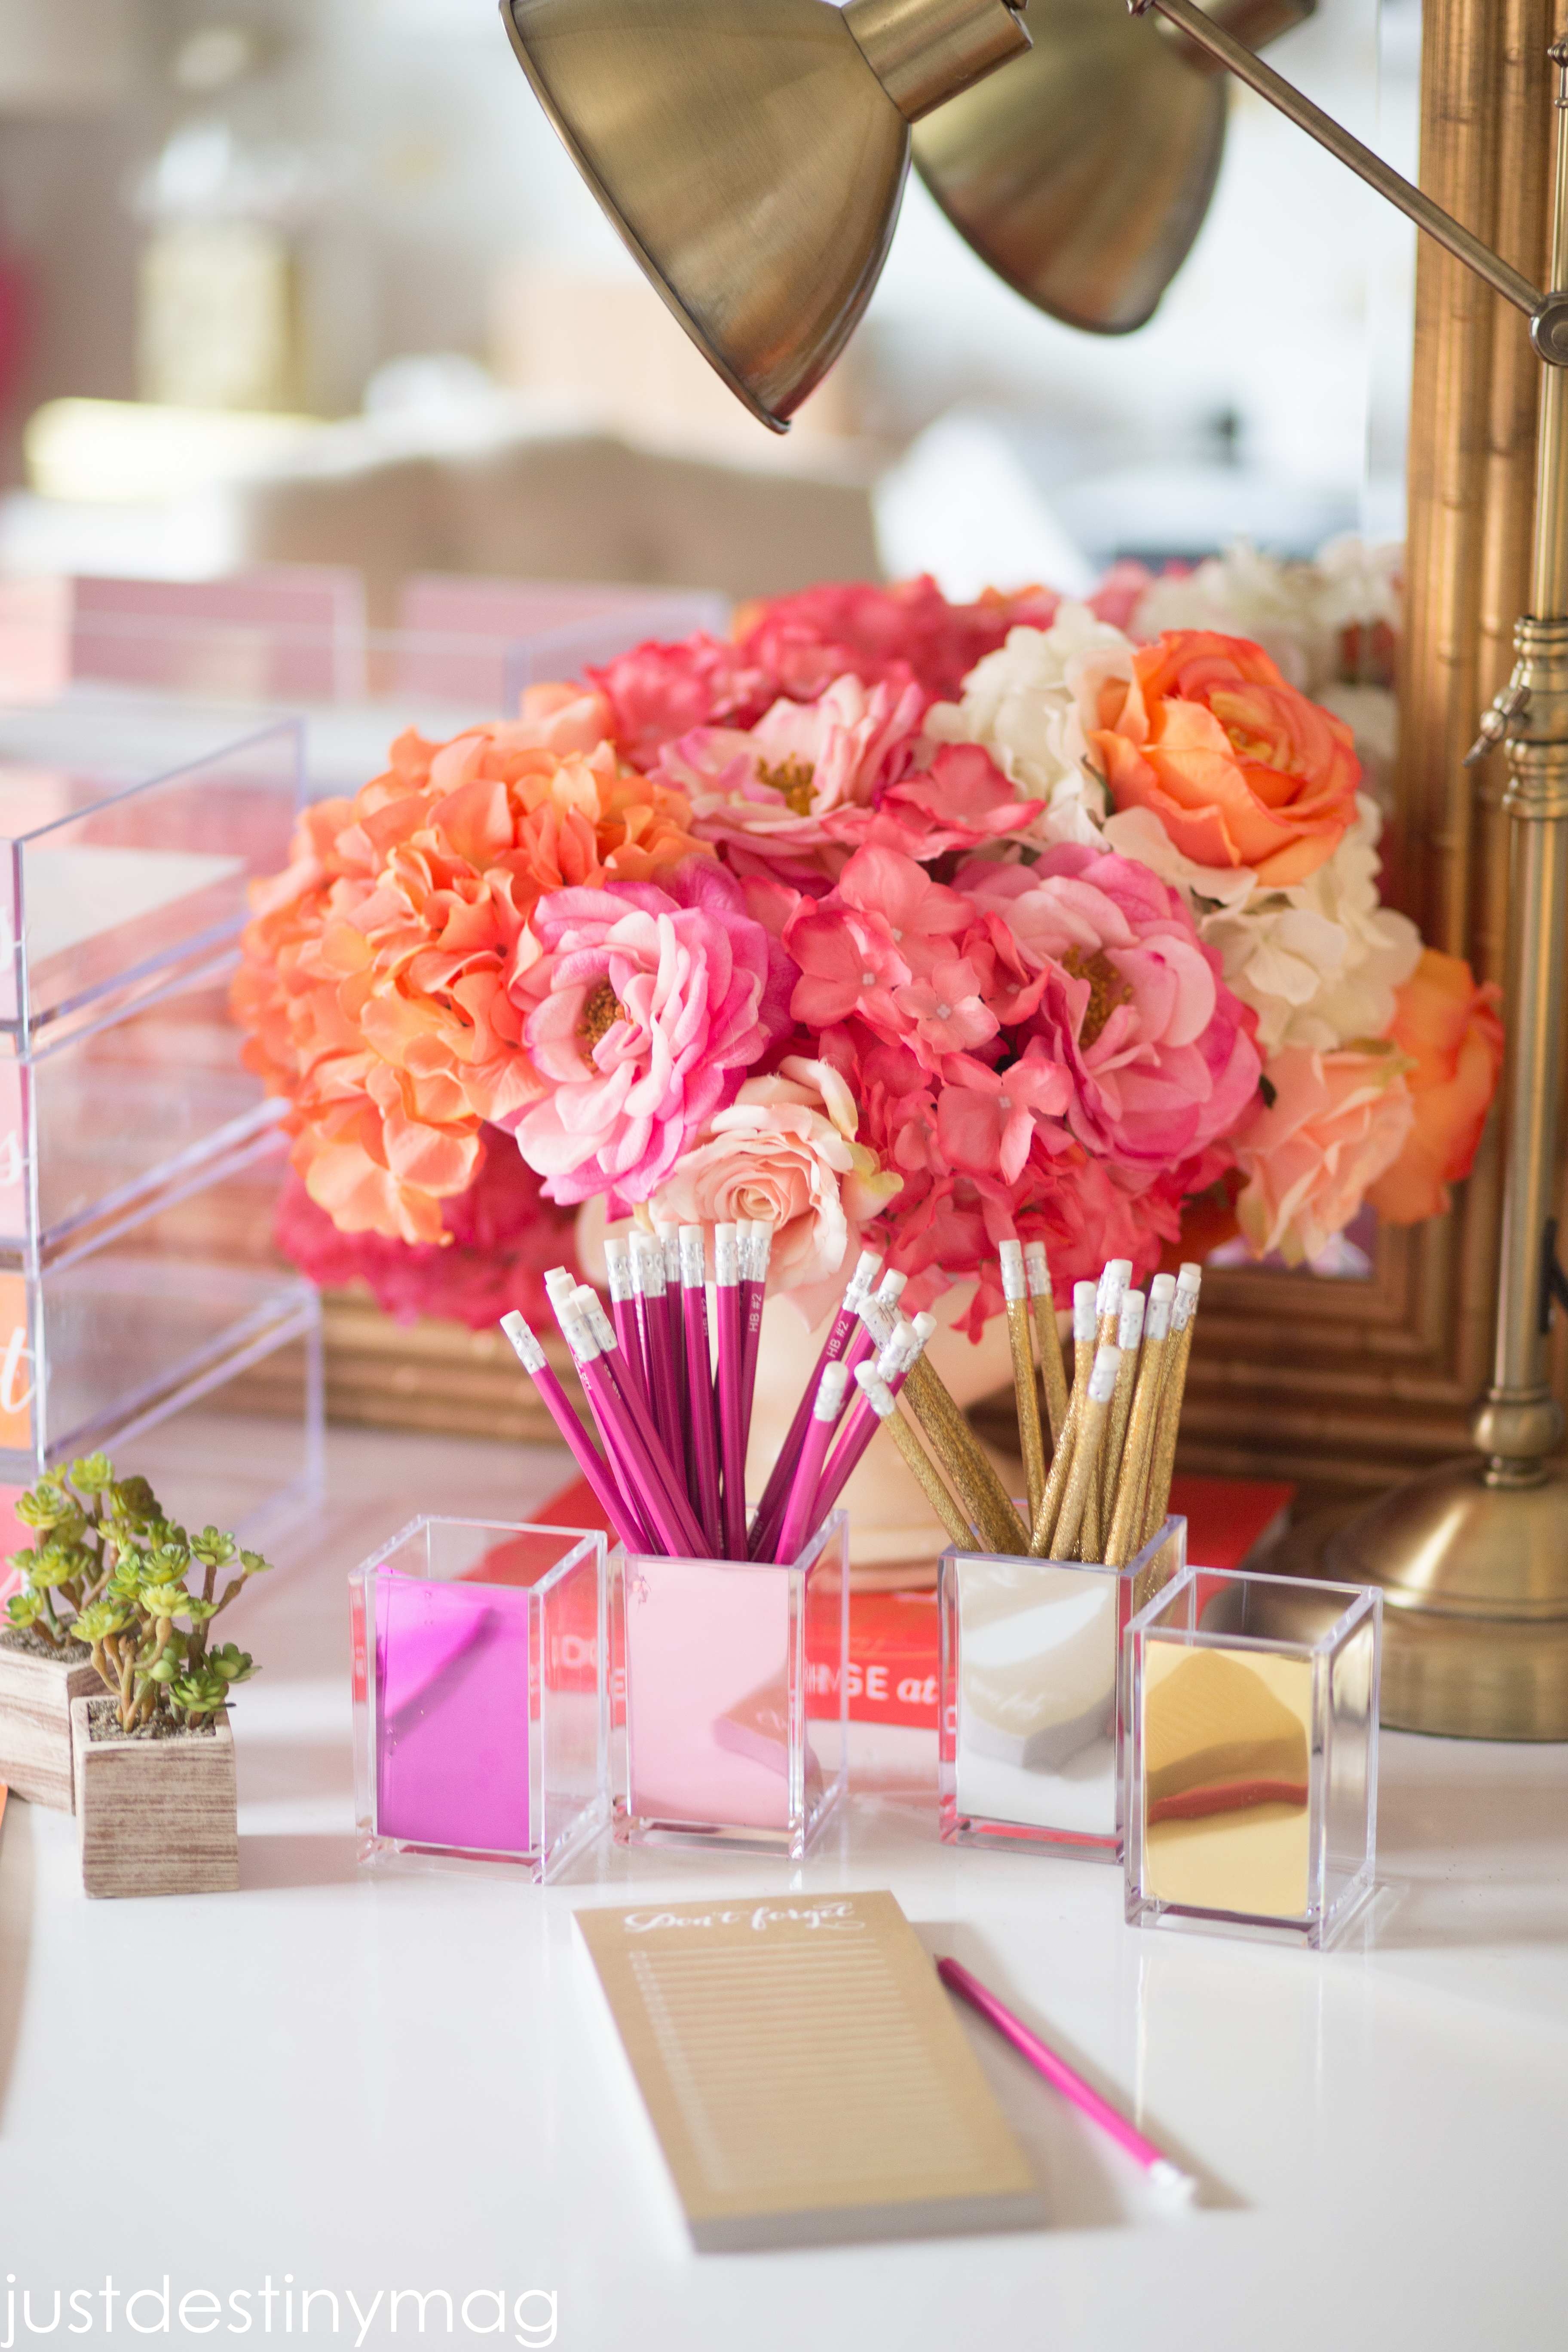
The second project I created were these foil pencil holders. I had some extra foil paper left over from another project so I decided to play with them a bit. All I did was cut to size the foil paper to match the inside of the acrylic pencil holder and slipped them right in. The best thing about this paper (Martha Stewart Transfer Paper) is that it clings to the sides of the paper so it pretty much stays in place without any adhesive! [line][line]
Visit my other creative friends and see how they used the #dressmydesk challenge! Better yet visit The Container Store during the office sale and start dressing your OWN desk now!
I LOVE this! What font did you use for the letter holders?
Hi! I used Isabella:0)
i too would love to know the font used on the labels!!! 🙂
It’s called Isabella:0)
This is SO STUNNING, I can’t even handle it. I seriously need to get some of these containers so I can give this a try. Pinning!!
Thank you Amy!
Gorgeous desk! Very inspiring! What is the cutting machine that you used for your labels? Where would you recommend purchasing this machine and font? Any feedback would be much appreciated!
Hi! Sorry for the delay! I actually have a Silhouette Portrait! I love it because it’s small and gets the job done. The font it called Isabella! I will post updated links for you on the blog post ASAP!
Thanks!
Gorgeous desk! Very inspiring tutorial! What is the cutting machine that you used for the labels? Where would you recommend purchasing the machine and Isabelle font? Any feedback would be much appreciated!
Love, love everything you do. Where did you find the hot pink pencils, thank you?
Thank you! Those are from Poppin! Target has them I believe!
What about the glitter pencils?
LOVE LOVE LOVE this. I can’t stand not having my office finished so that I can have this right on top of my desk! So great. Thanks for sharing your creativity!! I included your Kate Spade inspired organizer and desk accessories in a round up of Kate Spade inspired projects. http://www.casawatkins.net/2015/04/me-gusta-monday-and-little-secret.html
Love this idea! I included it in my Mode roundup.
I have searched everywhere for the acrylic trays used in your presentation (Kate Spade) with the pink and corals. Could you please direct me where I can purchase a set of these?
well this looks amazing, and great instructions.These are cute and so simple, thanks for the idea!
Hi,I log on to your new stuff named “Twitter” like every week.Your writing style is awesome, keep up the good work! And you can look our website about proxy server list.
Love it!!! What kind of Font you used on your destiny logo?