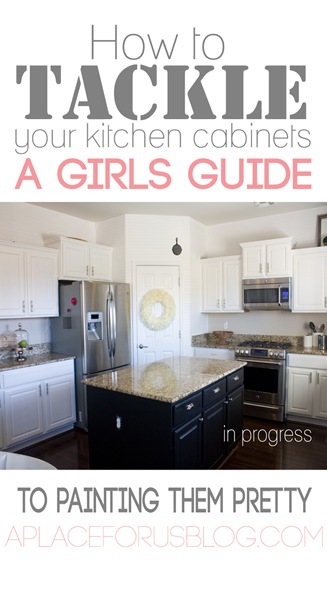
Before I begin with this super duper guide, I must say painting your kitchen cabinets isn’t the easiest DIY project BUT the results are SO worth it. I started back in Jan. and it’s still lingering. So it takes some time. But remember I have 3 small kids that need me 24/7 plus the rest of my life. But for a normal human like yourself who has their act together,should be prepared to set at least 2 weeks aside to tackle this project.
How to Paint Your Kitchen Cabinets
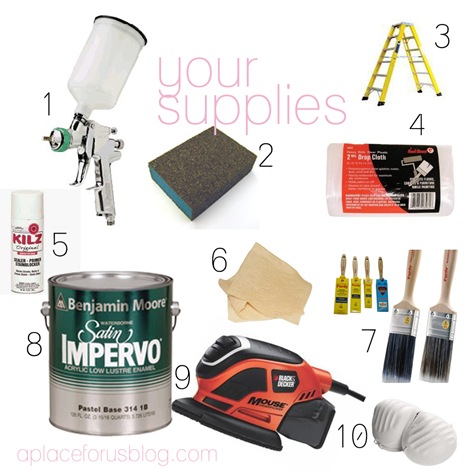
Before you begin you need to gather the following supplies. How do I know this? Well I did my research. Anytime I start a project that I’m not familiar with I Google it, Google it again and even Pinterest it:0) Then Goggle it one more time just to be sure. It’s important to do your research. Especially on projects like this. It’s not like were painting an old dresser YO.
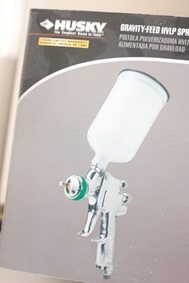
1. HVLP sprayers are going to give you the smoothest finish. Smooth like a baby’s bottom. This tool will help you get that professional look that your going for.
2. A sanding block in a 180 grit will help with the small sanding jobs you need to do. This works nicely on the fronts of the cabinets base if your sander can’t reach the tiny spaces.
3. THIS TALL THING. Bust it out. If you’re a shorty like me this will come in handy.
4. Drop Clothes are essential. Buy lots of them to protect all your fancy stuff.
5. Primer. I used KILZ odorless by the gallon (oil based) and then the spray can paint version as well. (Make sure your area is well ventilated! Open those windows friends.)
6. Tack clothes. Use these to wipe off all the dust from the sanding. You can also use a Shop Vac for that!
7. High quality brushes like Purdy will give you less brush marks. Use these if you plan on painting the cabinet base instead of spraying them.
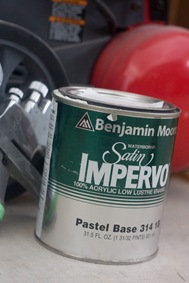
8.High quality paint. I used BEN MOORE IMPERVO in Dove White.
9.Mouse sander. Use this to sand all those uppers and lowers! Use a fine (150-180) grit paper
10. Unless you have an awesome human air filter, your going to need these to protect your precious lungs from ALL.THAT.DUST! (by the way every time I say the word precious in my head it sounds like that one line from The Lord of the Rings…weird.)
Other supplies:
Masking tape to hold down the drop clothes and such. Blue tape will come in handy to tape of the don’t not paint areas.
Small foam roller for priming your fronts, backs and drawers.
A damp cloth for spills.
Here’s a list of my bloggy friends who have been there done that. I encourage you to read their take on the process as well because EVERY kitchen is so different!
Sherry-Young House Love/Ashley-Handmade Home /Layla-Lettered Cottage
Remove your cabinet lowers,uppers and drawers.
The first thing you want to to do is take your cabinet doors off. Then clean and label them as well. Your going to want to label them so that they go back to the correct spot and have a snug fit. I simply used blue painters tape and a marker and used U1 U2 U3 for uppers, L1 L2 L3 for lowers and Is1 Is2 Is3 for the island cabinets. Same thing for the drawers. D1 D2 D3. Remember to label both the cabinet and the base. To clean the cabinets I used Method Pro Chef cleaner. Why? Because it works and it’s what I had a the time. If your cabinets are really dirty your might want to use something stronger. The point is you want to make sure the cabinets are grease free and clean.
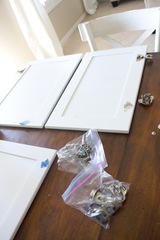
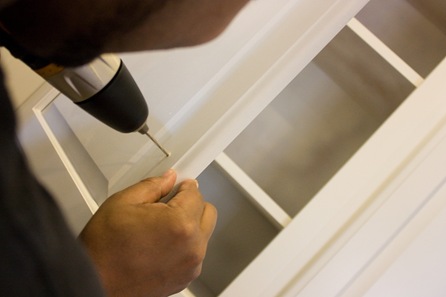
Next take your hinges off. I didn’t take any of my top hinges off and they were fine, Sprayed white. But fine. So I think this is just a preference. All my lower cabinets were sprayed with the hinges off. If you decided to do this make sure all of your screws and hinges are in a tidy zip lock baggie. You don’t want to be looking frantically under the sofa, in drawers, asking kids if they’ve seen a small little screw (hoping they didn’t eat it or add it to their Lego collection) or find yourself using a magnet to see if you dropped in on your kitchen floor when it comes install time. Not that anyone did that. Me? No not me. I’m just saying. This is a tutorial you know. Gotta prepare your for the worst…insert big fat->CHEESE!
Sanding.
Once you removed your hinges…or not. Then it’s time to sand everything. If you would like this process to go by faster, I would advise you to get some help. Husbands,moms,dads,son,daughters,best friends and neighborhood children. ANYONE. Give them some food and they’ll hop right on board.
Sometimes sanding isn’t necessary. But if you have even just the slightest gloss or polyurethane to your cabinets then I suggest you run your sander over it just enough to take off the gloss. Take 180 grit sand paper, put on your very important mask and get to working! Remember your not sanding it all the way down to re-stain your cabinets.
After you have sanded the fronts, backs and drawers it’s time to clean all the up with a vacuum attachment or a tack cloth. The shop vac was easier for me. But I also used the tack cloth as well.
Your going to do the SAME thing on the cabinet base as well. If you use a block sander it not necessary to tape your room off. But if you use the mouse sander. COVER EVERYTHING with a drop cloth. It’s a mess! Remember to keep your mask on at all times.
I have the worst allergies and this is the only way I got through this all. Make sure your babies aren’t around too!
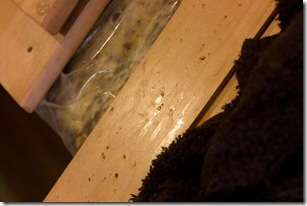
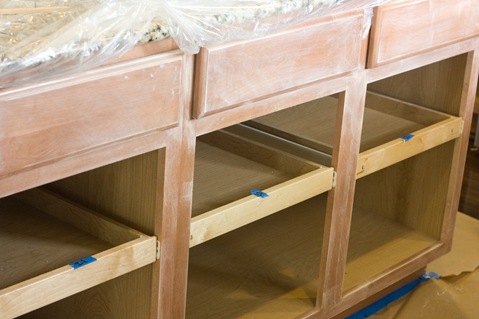
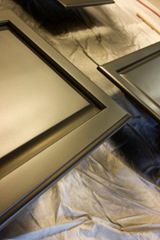
Here is an example of what the sanding process will look like when you’ve cleaned everything off with a tack cloth.
Prime Time
Your cabinet fronts,backs and drawers are going to need ONE coat of primer. For this step use a small HIGH quality brush and a small foam roller. Start on the backs, let it dry for about a day and then flip it over to do the same on the fronts and drawers.
Now it’s time spray on your primer or paint on your primer to your cabinet base with a high quality brush or roller. Again if you spray it on your going to have a smooth finish. I DIDN’T use my sprayer for this. Instead I came across a section of spray paint primer from my local HABITAT store. I got tons of cans for next to nothing so I used that spray paint for the cabinets (like 1.00 a can I think) It took about 8 spray cans to complete the entire kitchen. Remember, you only need one light coat of primer.
After that let the primer dry for about a day and go in and spray on your paint.
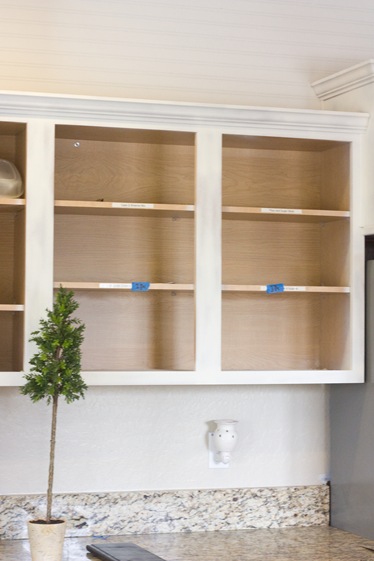
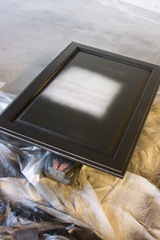
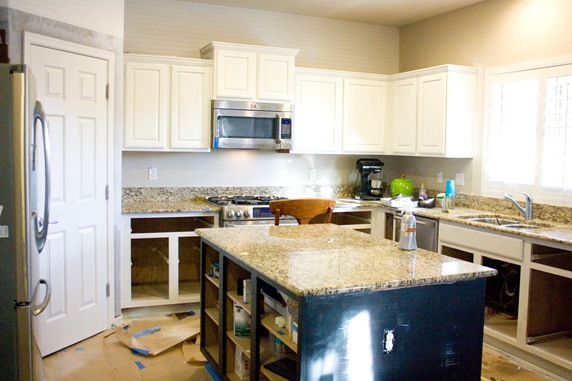
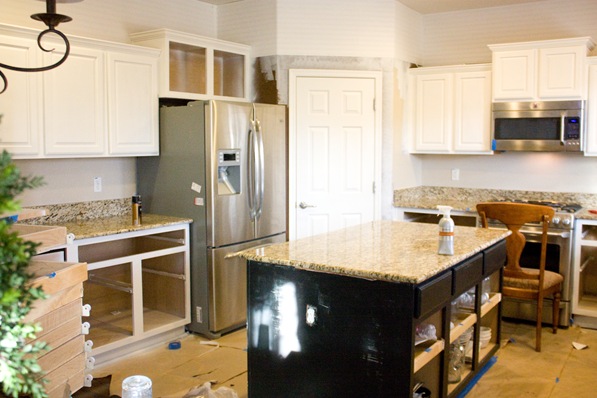
Here is a photo of what the primer will look like when I was done. Kind of blotchy but that’s ok! Don’t worry about getting a perfect finish for the priming part! I had already removed the drop clothes at this point and would put them back up WEEKS later…lol!
I’m not sure if you can use primer in your sprayer. It’s thicker then normal paint but ask your paint guy!
Painting
To paint the cabinets you need two very important tools. HVLP sprayer and really good paint. Both are essentials for a smooth finish.
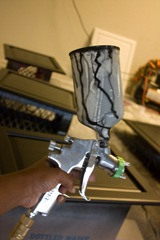
The sprayer I used came for Home Depot the HUSKY brand and cost me about 50 bucks. It attaches to my air compressor. I seriously love this thing and I think every DIYer needs one! It makes everything come out so professional. I want to spray paint everything now!
For the paint I used a high quality BEN MOORE IMPERVO paint in White Dove that I picked up from my local ACE. They didn’t carry the ADVANCE paint that I really wanted but the paint guy (who seemed to know what he was talking about) suggested this. The finish is outstanding. I’m super happy with it. You can’t see a single grain of wood thanks to the excellent primer and my maple wood cabinets.
Other contenders:
Ben Moore ADVANCE Paint
Behr Premium Plus Kitchen & Bath Paint
NOTES:
I’m curious to see if the ADVANCE paint is better as far as chipping. I’m going to have to add some sort of protective coat like LAYLA did. Some parts are as solid as a rock. Others( very small ) parts seem to have some chipping.
Before you begin to paint, practice a few times on scrap wood. Make sure the flow is right and the consistency is correct. If you think your paint might be to thick ask your paint guy how to thin it out. My base paint was water based so I was able to use water.
Start on the back of the cabinets as advised by Sherry so that your fronts are smudge free. When it comes time to moving them and installing them you won’t have to worry about any imperfections on the front. As you paint, go back and forth and stroke BEYOND the cabinet so you won’t have that awkward paint line.
Keep going in a horizontal pattern until your done. Once you’ve finished the backs let them dry for about two or three hours OR longer if need. It really depends on the weather. Obviously here in AZ things don’t take to long to dry. But if you live in a more humid state you might have to wait a day or two in between coats. When you drying time is done give it another even coat. You have the option to sand in between your coats as well. Sometimes you might need to if debris has snuck into your drying spot. Go ahead and use your block sander and give it light sanding, and clean it with your tack cloth. After that apply one more coat to make sure you have full coverage.
I should tell you that your coats don’t need to be heavy. You can tell if the coats are to heavy if you have runny drips. This means you need to adjust your sprayer.
Let the backs dry for 2 to 3 days.
Do the same to the fronts and to the drawers. Make sure you have plenty of room to let things dry.
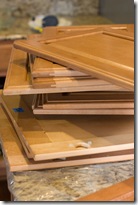
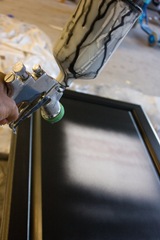
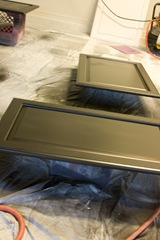
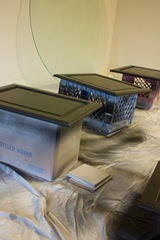
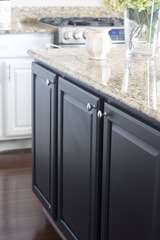
Here are some photos of me working on the kitchen island cabinets. Take a note at the finish!
While your waiting for the paint to dry, go inside and start to paint your cabinet base. You have two choices.
-
You can use a roller and a high quality brush to tackle the cabinet base
-
Use your HVLP sprayer to spray your cabinet base
If you choose option 2 like I did, make sure everything is taped off, sealed and protected. If your not going to paint the inside of the cabinets then protect that as well. Put on your mask and get to painting. Again make sure you have enough ventilation. I wish I had more photos to show you, but this is around the time my computer got sick. Real sick.
Catch up on a book, read a few blogs, give a friend a call and water the plants! Come back and give it another coat!
Now it’s just waiting time. Wait about 3-7 days before you begin to re-install.
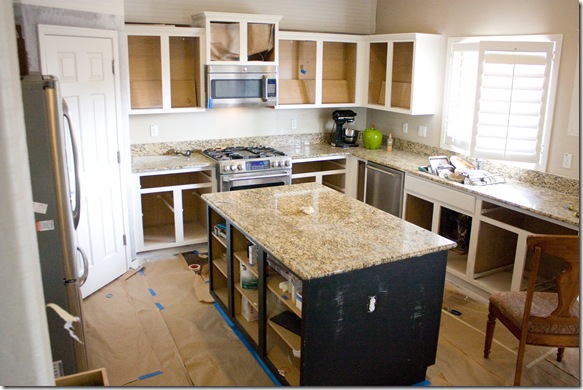
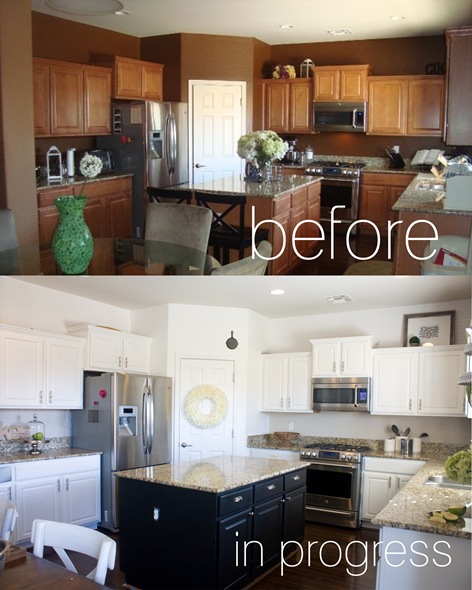
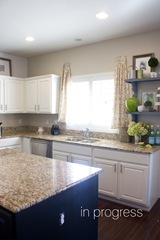
Here is a photo of the cabinets after everything was painted! You can see above the microwave that I taped off the insides of the cabinets.
RE-INSTALL
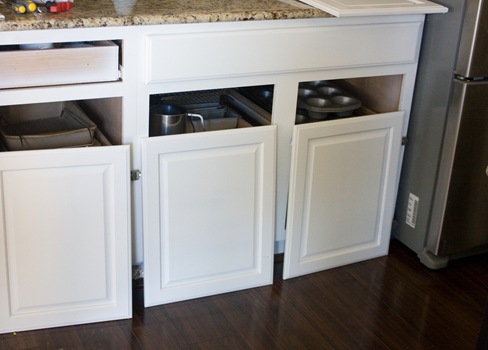
Now it’s time to install the hinges if you took them off and rehang your cabinets!
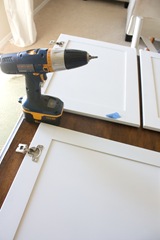
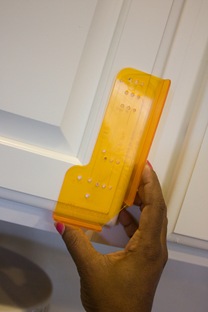
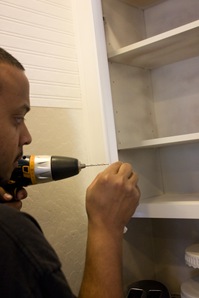
If your installing new hardware do that as well! This is hardware template that you can pick up Lowes or Home Depot to help you. Can’t install hardware without it!
So there you have it! Kitchen cabinets painted!
Next time I will share all the cosmetic updates that I want to make like backsplash plans, hardware choices, lighting, etc. I will be sharing sources as well! Have a great weekend FRIENDS! Maybe you’ll be TACKLING your kitchen cabinets.
Stick around for a fun giveaway this afternoon! More pretties for your girl!











This awesome! Wow girl! It really turned amazing! I have been debating doing this myself but it seems so overwhelming. I had thought about doing the cabinets one weekend and then the doors the next. I work full time so I really only have weekends to work on it.
Thanks so much for posting this!!
Wow! I love it but man does it look like a lot of work! Great job Destiny! They are beautiful!
Looks go bright! I love it! I wish I could talk my hubby into letting me do our cabinets but I keep getting DENIED!!!
Such a beautiful makeover, Destiny. Thanks so much for sharing your tips. Your kitchen looks so much bigger and brighter now. You must be thrilled!
Beautiful Job as always just about to redo my kitchen…. hate the cabinets there dark brown formica anyway thanks for posting all that information that was a workout in itself,,,,,,have a great day ttys…….
This is a great tutorial. I really like the mix of black and white cabinets. Thanks for hopping me to the hardware tool. I didn’t realize suc a thing existed.
It’s settled! I’m re-doing my kitchen this summer. Hooray~your photos were just what my husband needed to see and he agreed to it. My kitchen is now the EXACT same (even down to the knobs on the cabinets) as your before photo. I can’t wait! I will do the lower cabinets in black and uppers in white since we don’t have an island. All I care about is saying goodbye to the honey oak. 🙂
It’s settled! I’m re-doing my kitchen this summer. Hooray~your photos were just what my husband needed to see and he agreed to it. My kitchen is now the EXACT same (even down to the knobs on the cabinets) as your before photo. I can’t wait! I will do the lower cabinets in black and uppers in white since we don’t have an island. All I care about is saying goodbye to the honey oak. 🙂
I love your place….love…love….no wonder took you to my place.
Also I was trying to find your tutorial on the wall signs but takes me to the kitchen cabinets one….I would love to steal the idea and learn as well.
But in the mean time I’ll attempt the feathery accent…gorgeous….will post once I’m done 🙂
Wow. I am really impressed. That looks so professional. Well done. So–question for you on that sprayer. Do you think it would work well to spray paint an entire room like a bedroom or bathroom? Or would it take a really long time? How small of a compressor can I use? What else do you use your compressor for (trying to justify buying one here 😉
Wow. I am really impressed. That looks so professional. Well done. So–question for you on that sprayer. Do you think it would work well to spray paint an entire room like a bedroom or bathroom? Or would it take a really long time? How small of a compressor can I use? What else do you use your compressor for (trying to justify buying one here 😉
Wow. I am really impressed. That looks so professional. Well done. So–question for you on that sprayer. Do you think it would work well to spray paint an entire room like a bedroom or bathroom? Or would it take a really long time? How small of a compressor can I use? What else do you use your compressor for (trying to justify buying one here 😉
Those cabinets look fantastic – a job I desperately need to do in my new, older kitchen.
Thanks for sharing!
Peace, Judi
This looks fab! I am wondering if your cabinets “stick” at all, or if the paint coats feel really thin and dry. If you know what I mean? I lived in an older house in college and the cabinets were painted white. They kind of stuck together and sometimes the paint would come off due to the sticking. I’m sure it was a bad paint job, but let me know, as I would love to do this!
So thrilled for you! Truly an awesome job. I did the same thing to a kitchen for my daughter last summer. I can’t say enough about the benefits of using an HVLP sprayer. Wish I had bought one years ago. Just one note, maybe I missed it, but I used a turntable to place the cabinet doors and drawers on. This way you can stand in one spot while you turn and spray them. Then lift off from underneath and move to a drying location.
I had my cabinets sprayed using the advance and they are chipping like crazy! What’s worse is that bc the spray has a different finish, when I do touch up, it’s totally obvious. Very disappointed! I had them done last summer. I’m eventually going to lightly sand all the doors and paint a layer by hand.
I have painted my cabinets twice. They started out a cream color and I painted them blue. Now I have painted them A light coffee color. I recommend you work in sections. Complete a section before you move on. You start to see the results and it keeps you going. It is a hard job but well worth it. It’s all in the prep work.
Awesome! Found you on Pinterest…so glad I did! Impervo paint is great and we love it for doors and trim as well! You did great! Kudos!
Looks awesome!! I would love to see something done with the door in the room. Maybe painted a pretty blue/gray or a chalkboard door. I feel like it’s off. Please dont take that as a criticism. I think you did an amazing job!
Wow! Great tutorial! Thank you for all the details and pictures. I’m pinning… were buying a house and I just might be the one painting the kitchen cabinets!
Simply gorgeous! I just found your blog and will continue to read it!! Wonderful job:)
Thanks for visiting Sharon!
Destiny, I love your kitchen! So bright and cherry. We bought a husky sprayer as well, but we are having such a hard time with it. I have a few questions that I hope you have time to answer sometime 🙂 Do you thin your paint? How big is your air compressor? Thanks for your time!
Your kitchen looks wonderful, what an inspiration! I am interested in the air compressor you used, do you have the specs on it? I have heard conflicting information on what size you need, I want to use the husky hlvp and your cabinets look great so I want to mimic your process. How are they holding up? Any need to touch up or repaint? Thanks for the great post.
Let me check on that for you! Sorry so late! BUTTT I would say, if you can afford it or if your cabinets are new you should get a professional to do it!! It’s a lot of WORK!! lol!!!
just found your blog…Thank you so much for posting this!! This is almost exactly the layout of MY KITCHEN & my cabinets! Such an inspiration.
who would have thought that simply painting the cabinets would make such a difference
Love love love!!!!! Such a cute and helpful site….I’m planning to do my kitchen exactly as you did so was thrilled to see your photos….. One question…. Did you finish your cabinets off with a POLYURETHANE? They look fantastic!!!!!
I didnt! But I would recommend it!
Love your kitchen! I have one question, what color is the black paint your used on your island? Thanks!
Your kitchen looks amazing! I’ve struggled the past few weeks debating on whether to paint my kitchen cabinets myself or hire a professional. You have inspired me to take on the task myself! I know it’ll take time, but I’m a DIY kind of girl, so I know I can do it. Thanks for this great post!
Hi Destiny! I just emailed you about being featured over at Remodelaholic, but my emails sometimes get caught up in spam filters, so I wanted to leave you a comment too, just in case. Email me back at hello@remodelaholic.com please! thanks!
Great! I will check!! xoxo
I loved YOU from the get-go. I plan to use my HVLP sprayer to spray my kitchen cabinets. I am borrowing it from my brother-n-law. I love your help. I never comment on things so it says lots about YOU! I will put you in my favorites! I couldn’t COMMENT in that specific section, so I am “replying”! Keep up the good work. I live in AZ also!
I loved YOU from the get-go. I plan to use my HVLP sprayer to spray my kitchen cabinets. I am borrowing it from my brother-n-law. I love your help. I never comment on things so it says lots about YOU! I will put you in my favorites! I couldn’t COMMENT in that specific section, so I am “replying”! Keep up the good work. I live in AZ also!
Thank you so much!!! I’m happy you stopped by and that you’re trying the sprayer! Let me know how it goes.